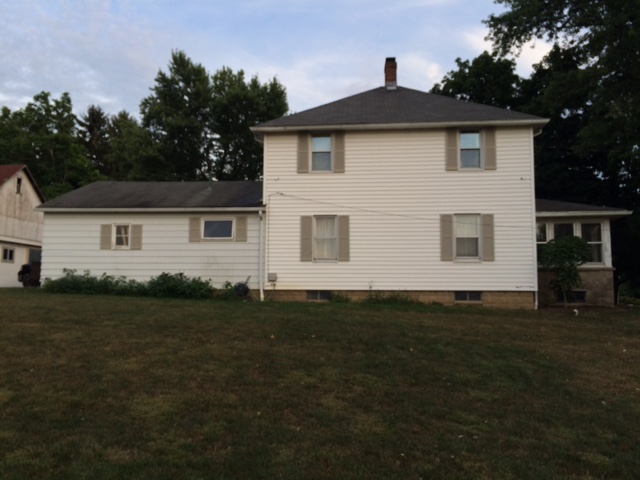
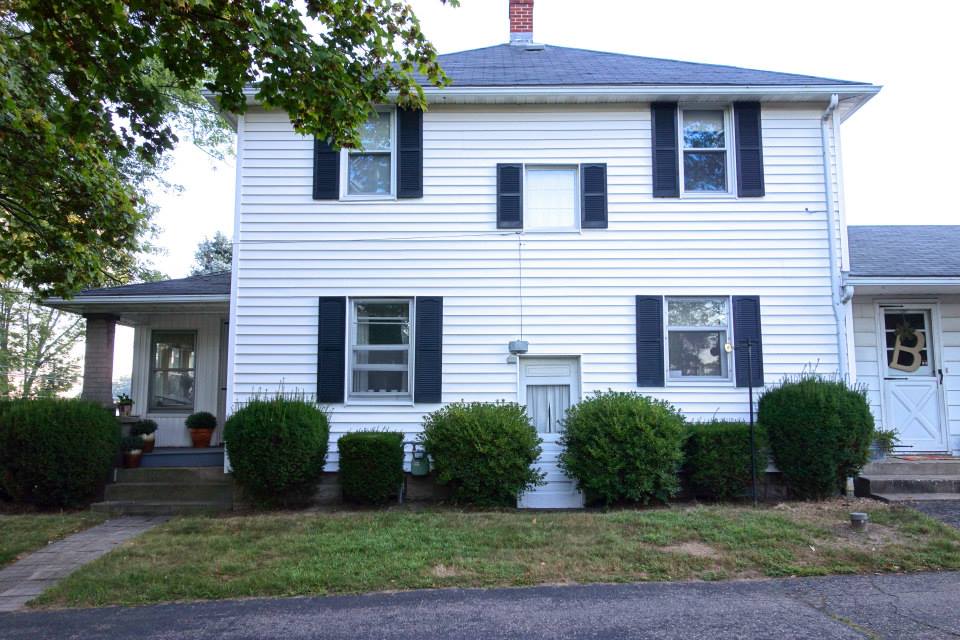
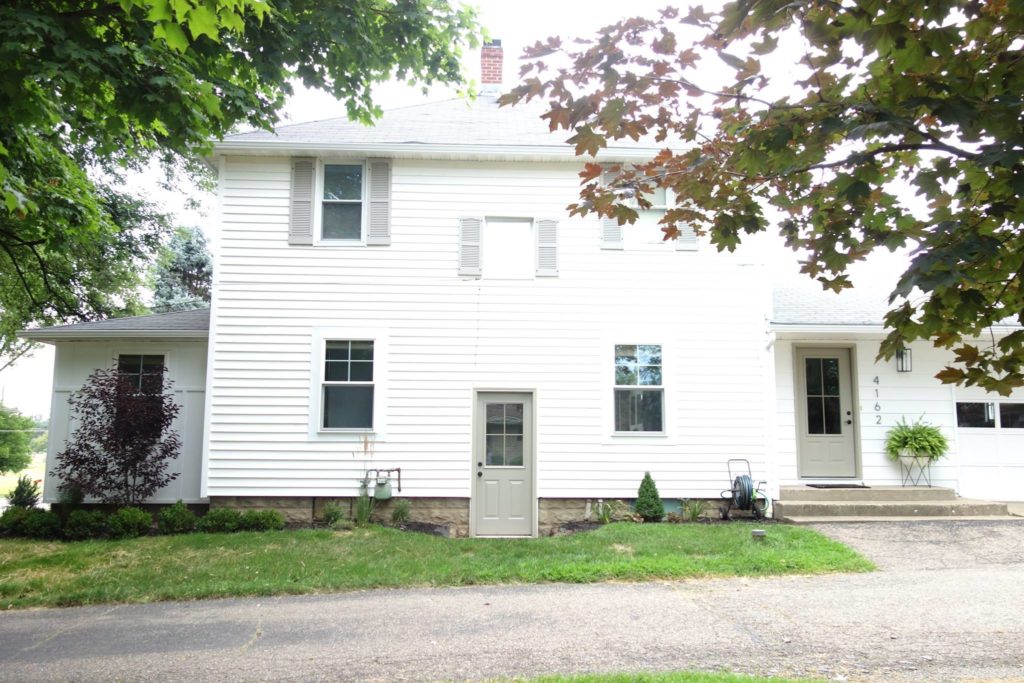
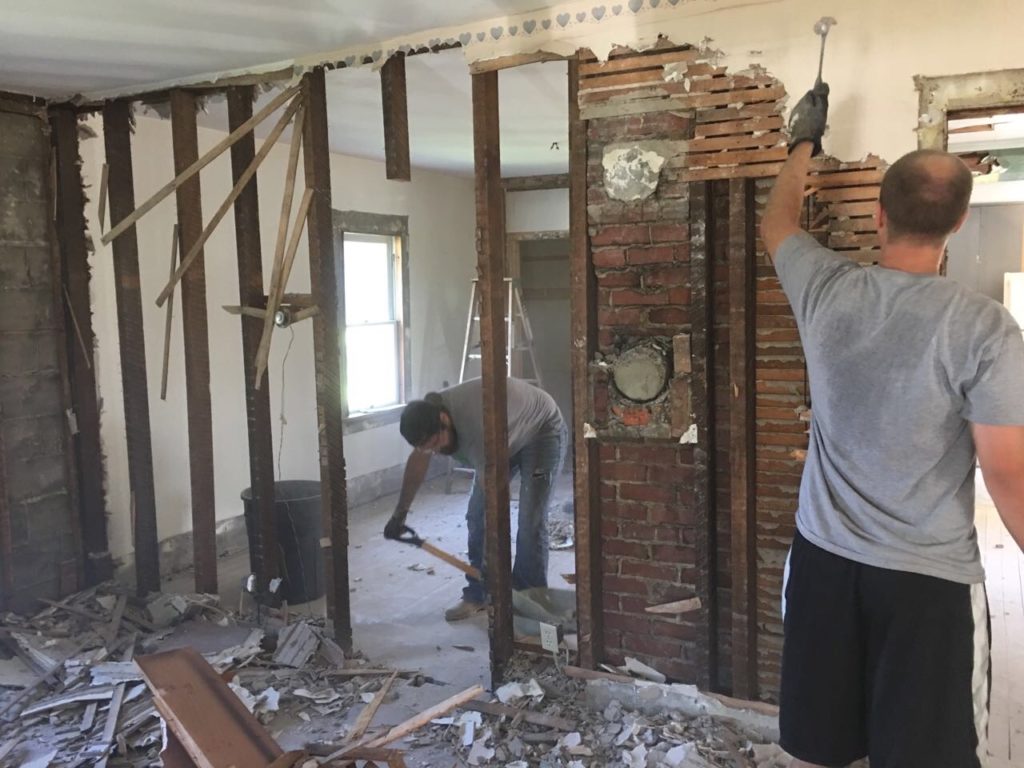
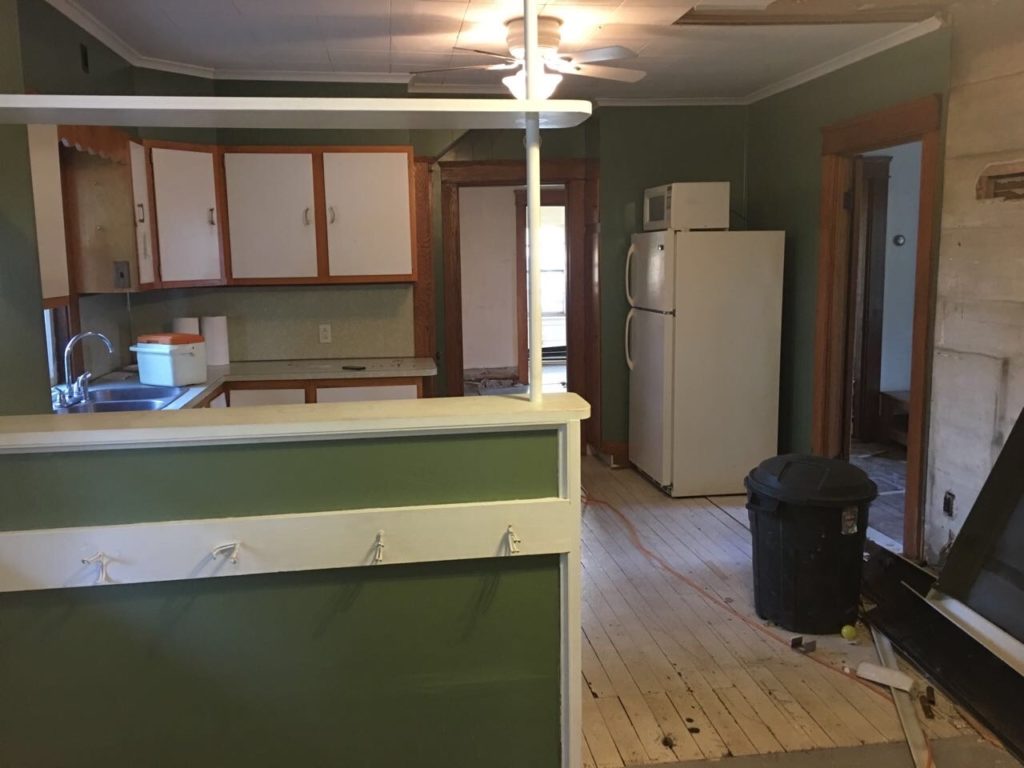
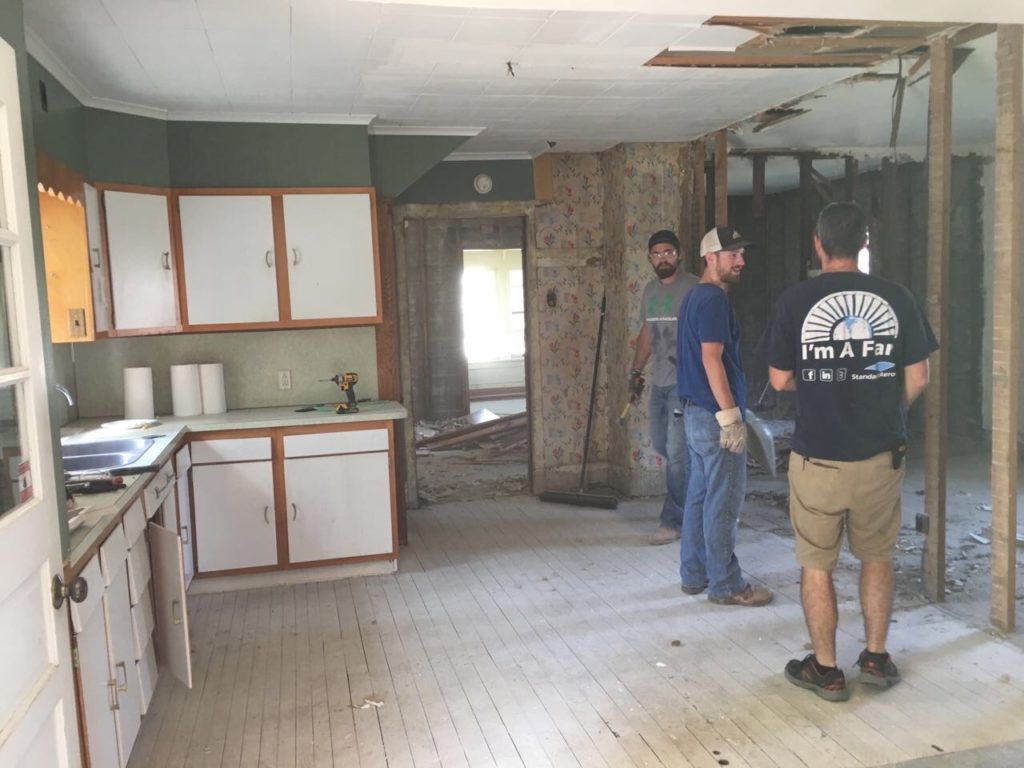
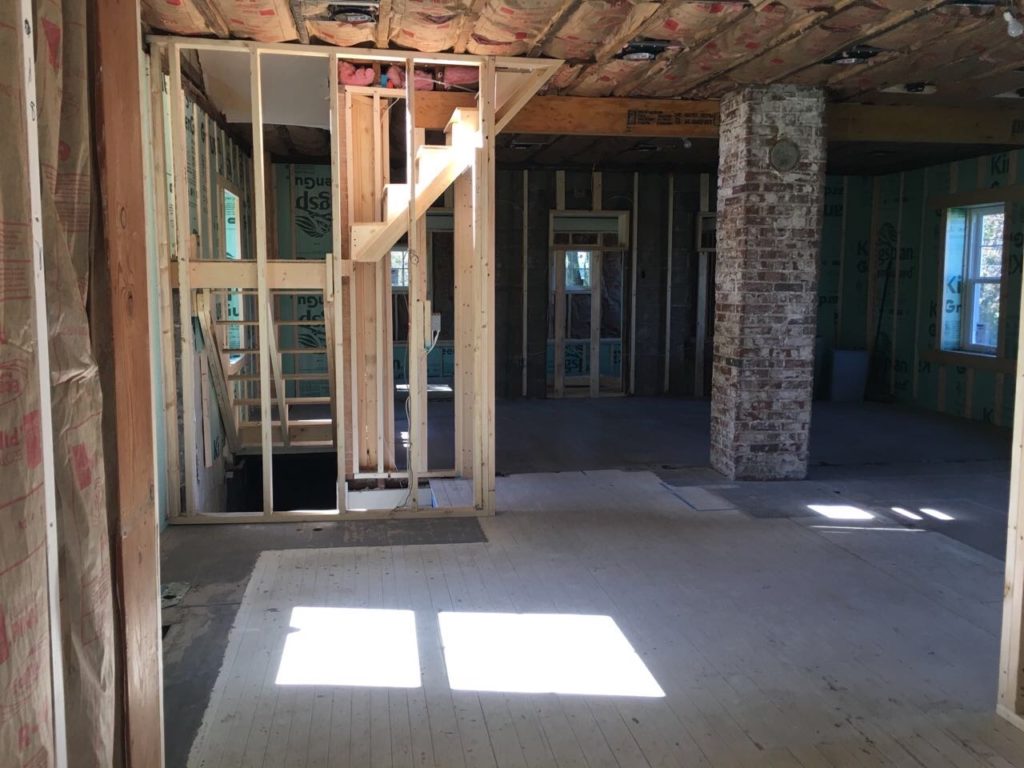
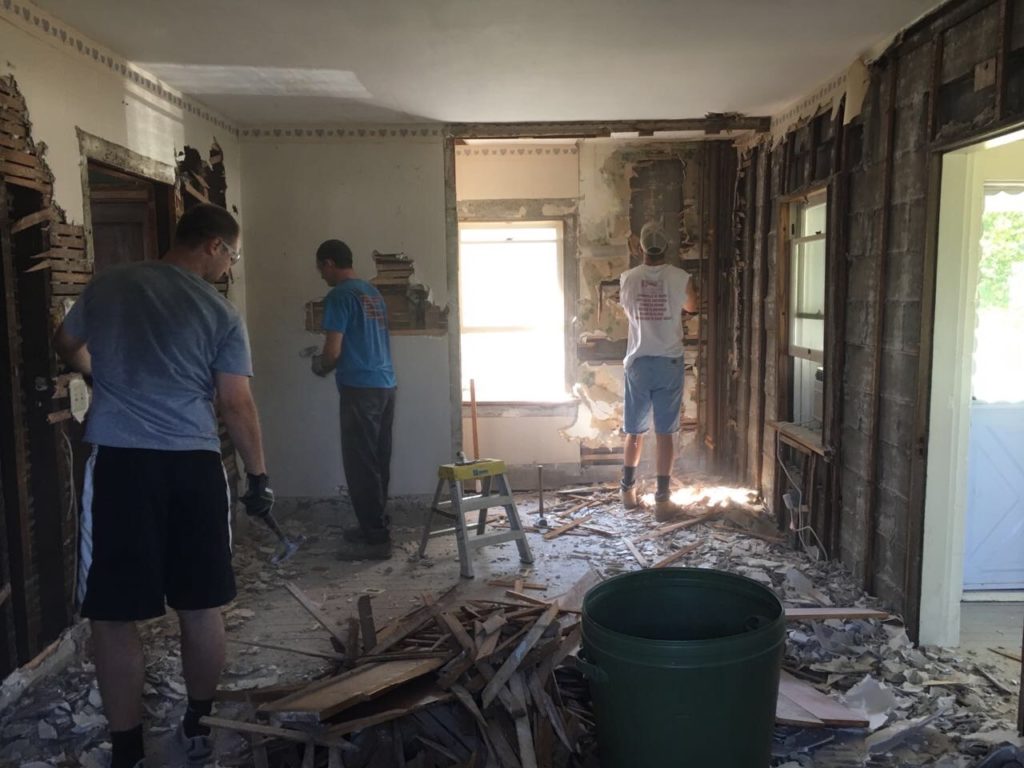
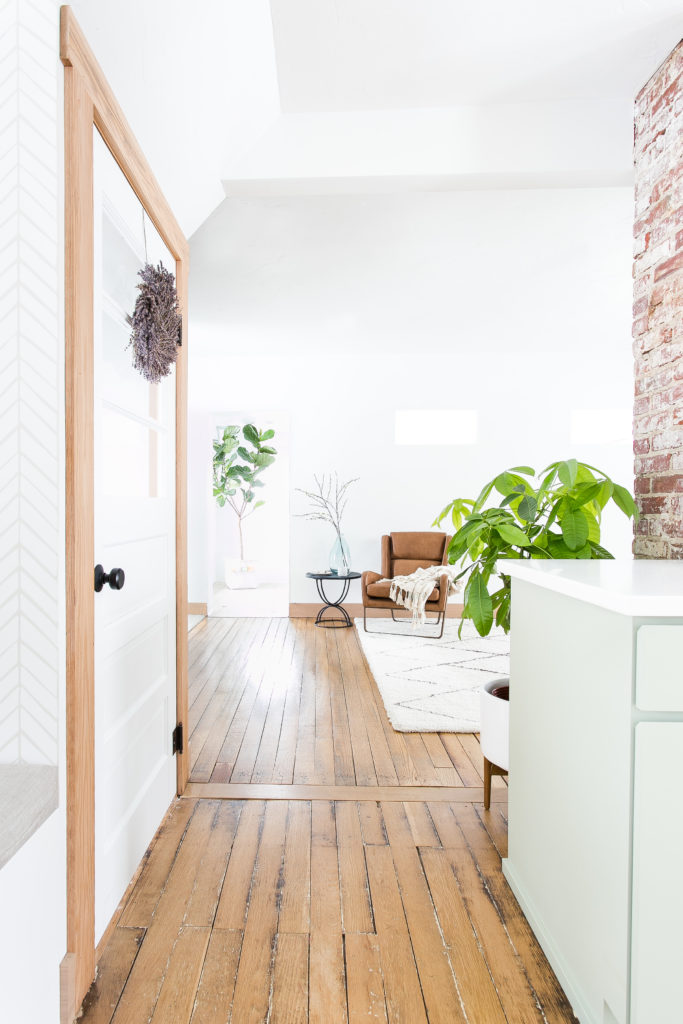
This project was (as they say) very near and dear to my heart. This was my and Kyle’s personal home before we bought and renovated the home that we are in now. We bought this house with the idea that it was not going to be our forever home; that we would remodel it and eventually sell. The house was built in 1912 in a traditional mid-Western farmhouse style. Think high ceilings, wide oak trim, casing and crown, and lots of small rooms. It had two stories, 1.5 baths and 4 bedrooms and came complete with a LONG list of issues for our growing family. This is what we were dealing with…
ISSUES:
> extremely dated; the last remodel was in the 1960s when the garage addition was put on
> lots of storage issues (maybe those of you living in older homes can relate?)
> no storage in laundry room
> no coat closet
> very small bedroom closets-
> the kitchen-tucked away from the living room
> very little prep space-
> no dishwasher and no room for one
> fridge was offset to the side, not really apart of the kitchen
> CARPET!
> no place for a dining room table-
> no ceiling light fixtures; only one wall sconce in each bedroom and bathroom which made it feel very dark (again, where are my old home owners at?!)
> no shower
> damaged and unattractive baseboard heaters
> original windows that desperately needed replaced
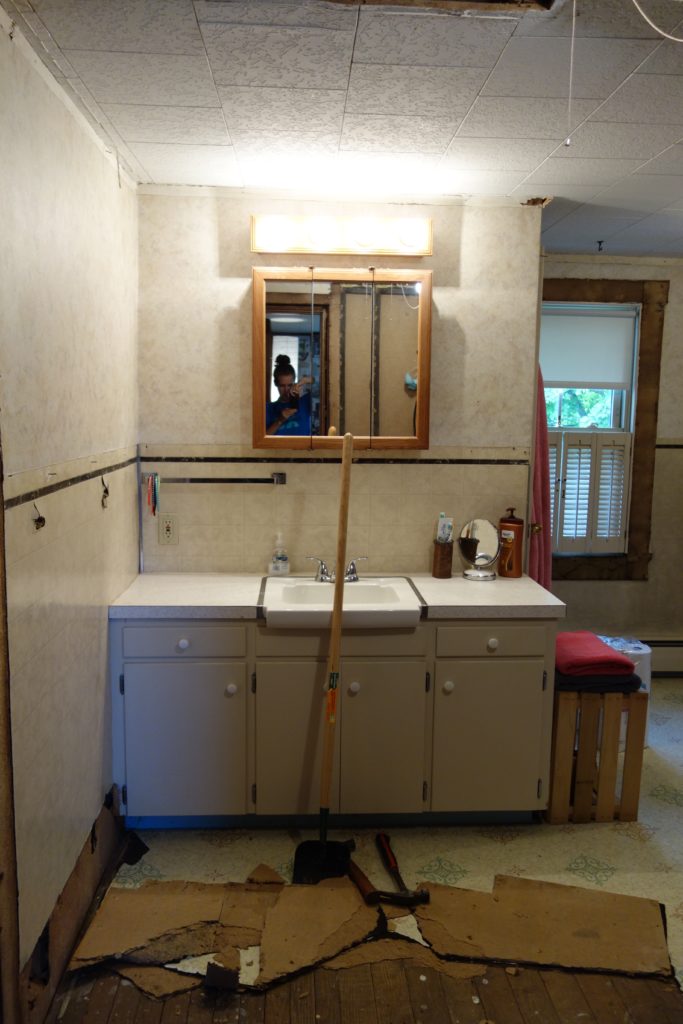
> small bathroom with…wait for it…CARPET
> no wall space for a TV in the living room due to window and door placement
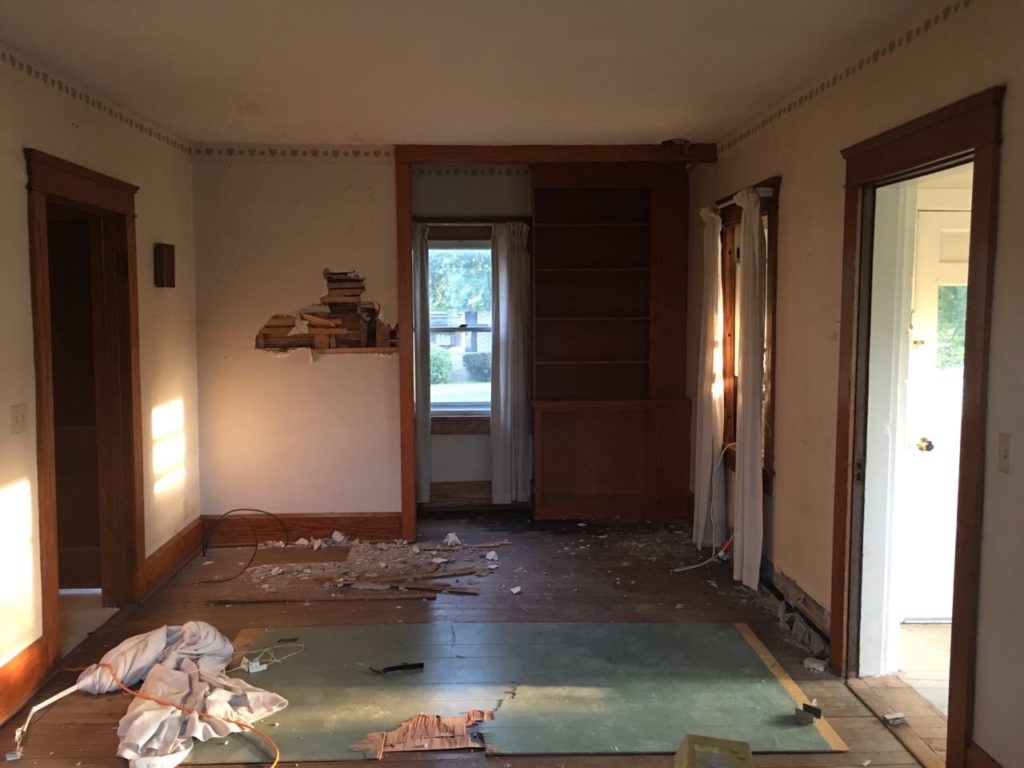
> plaster walls and ceilings that were cracking
> trim was damaged.
As you can see our young family was taking on a grand fixer upper. Can you picture it in your mind in all its love-needing glory? Writing all of our issues down like this looked like a lot, but we were prepared to tackle and overcome the challenges this house presented. We took our long list of issues and began to come up with solutions that would fit our budget and serve our family better, as we do with our clients.
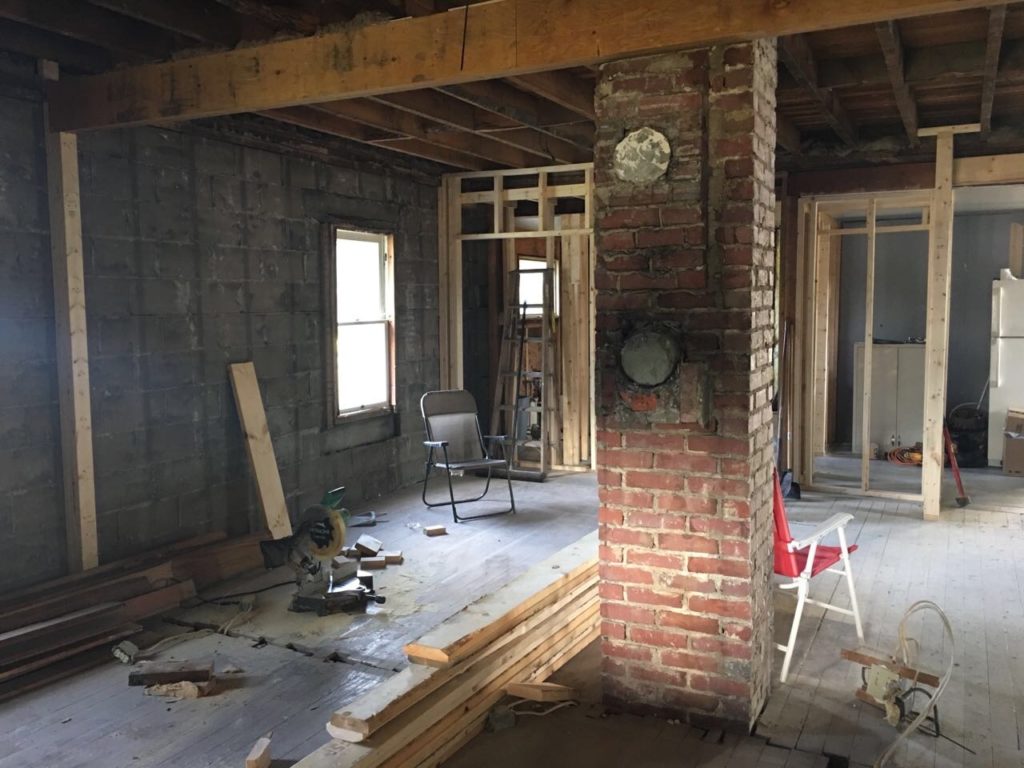
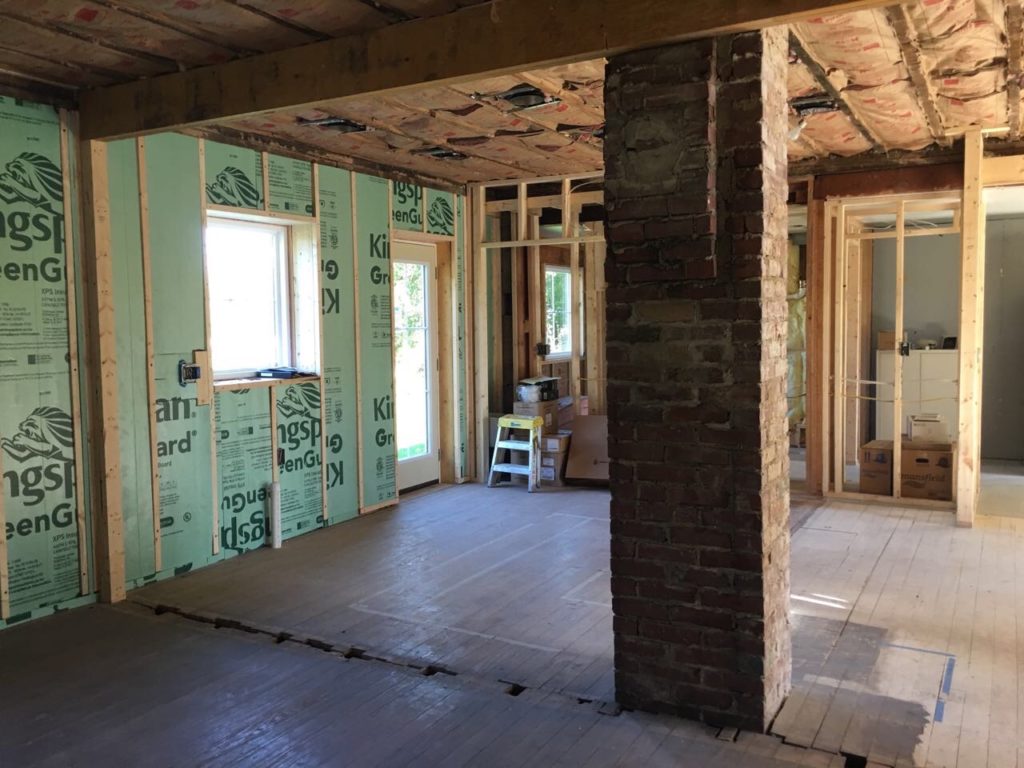
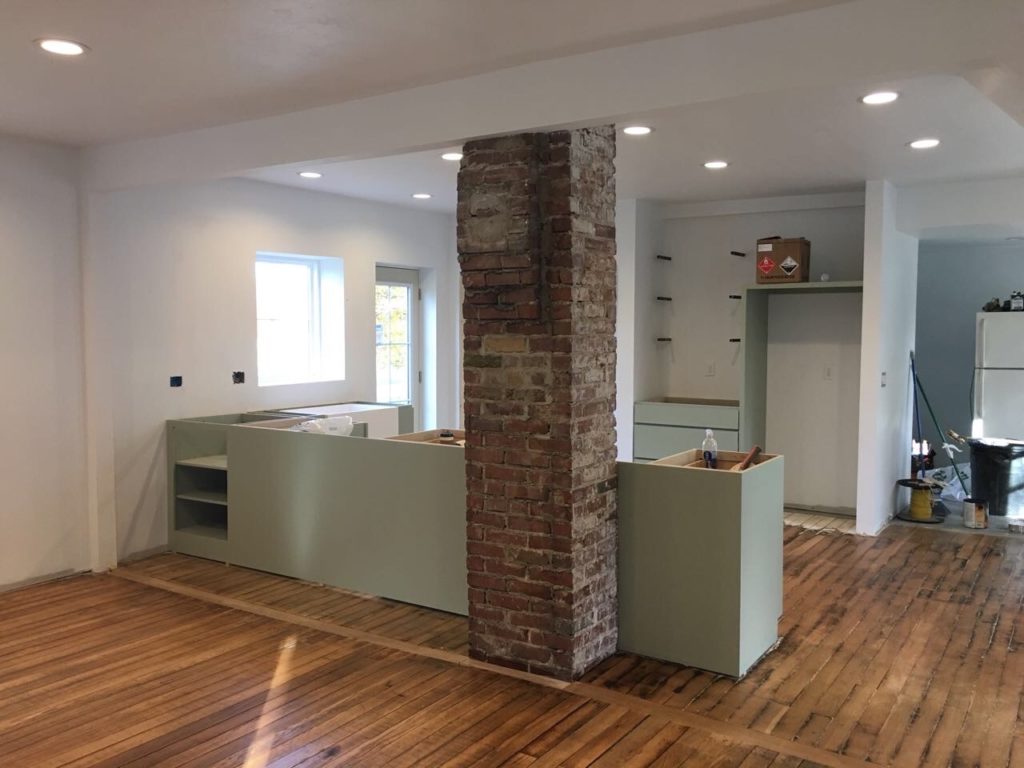
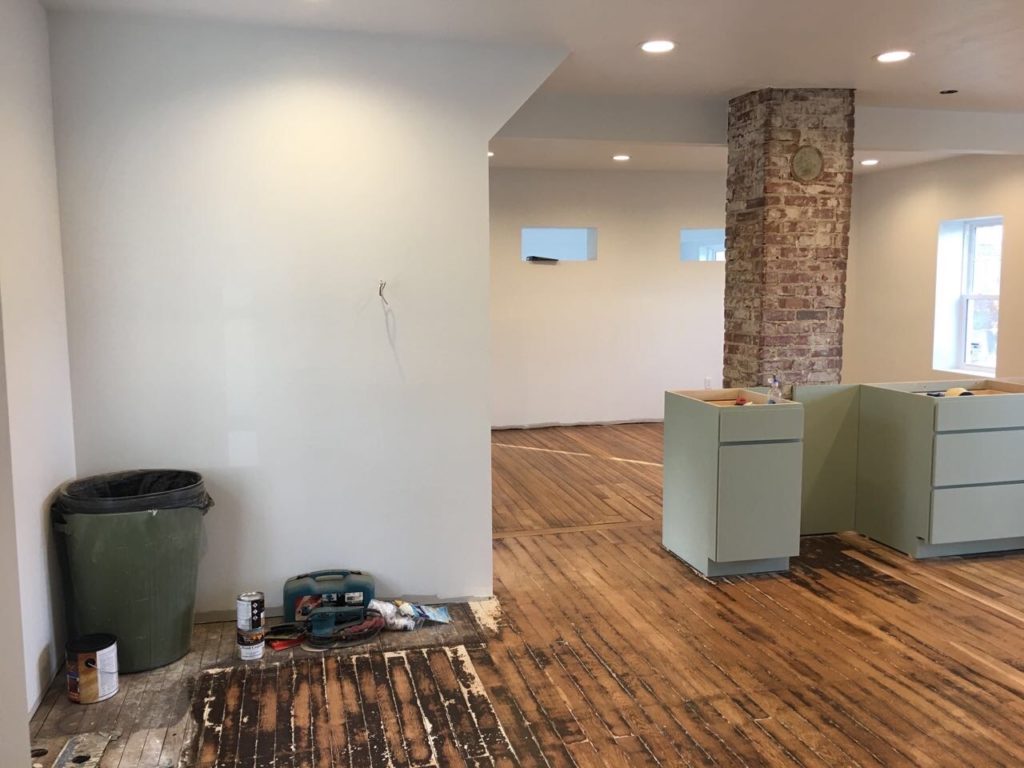
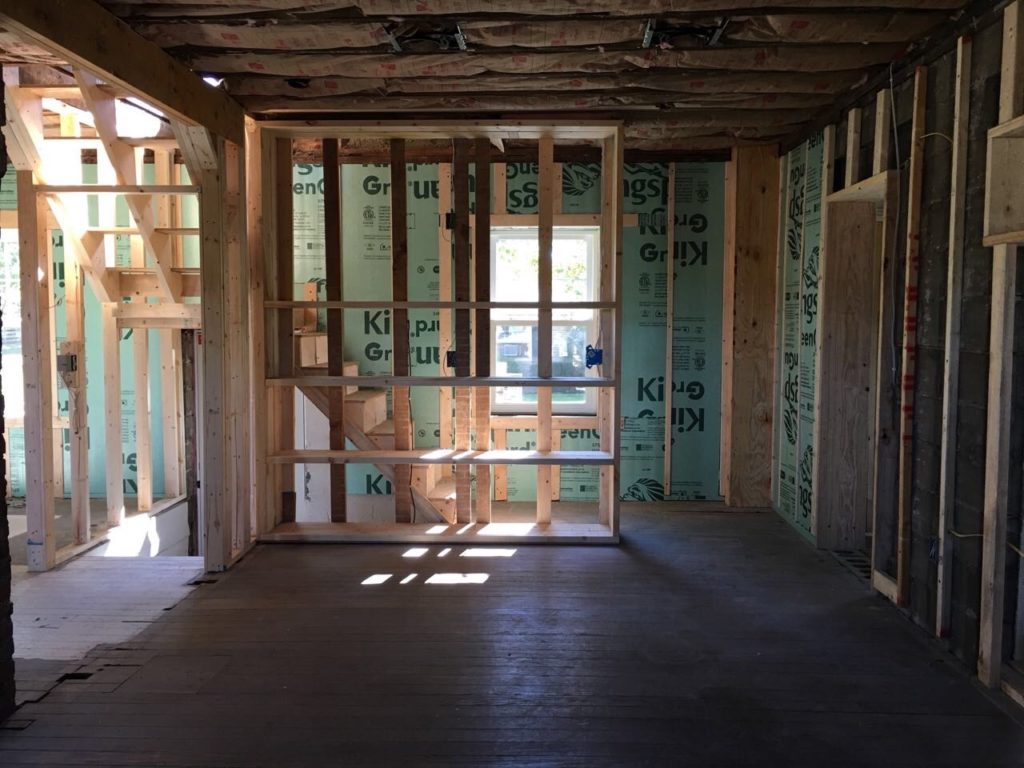
Our remodel solutions went something like this: make the house more open concept, give the kitchen more counter space for prep, remove baseboard heating and install in-floor heating, replace all the windows, remove and re-finish the original trim work, create a space for a table and a TV, increase storage and closets, add can lights throughout, and re-work the laundry room to include storage and add a full bath. Whew. Was that a run-on sentence? Maybe.
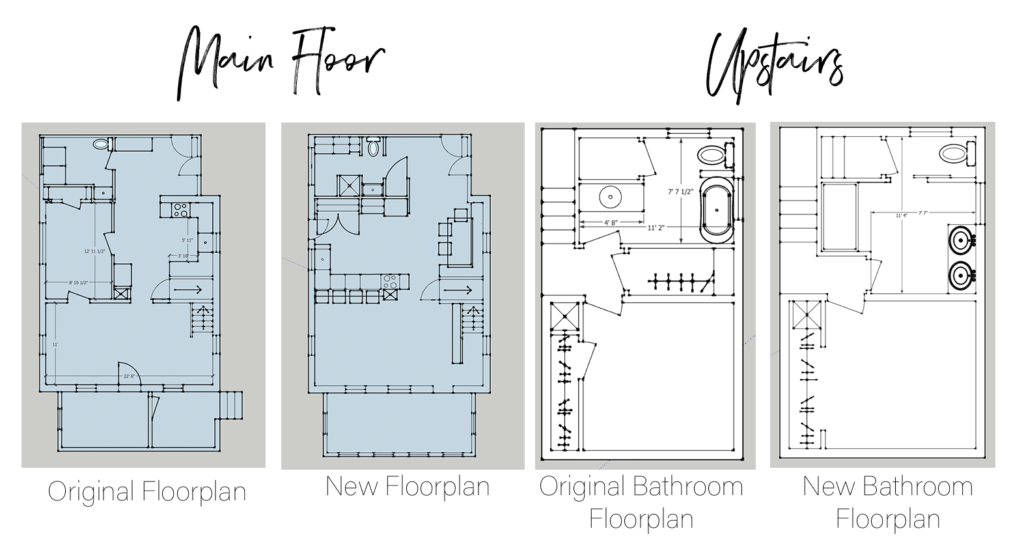
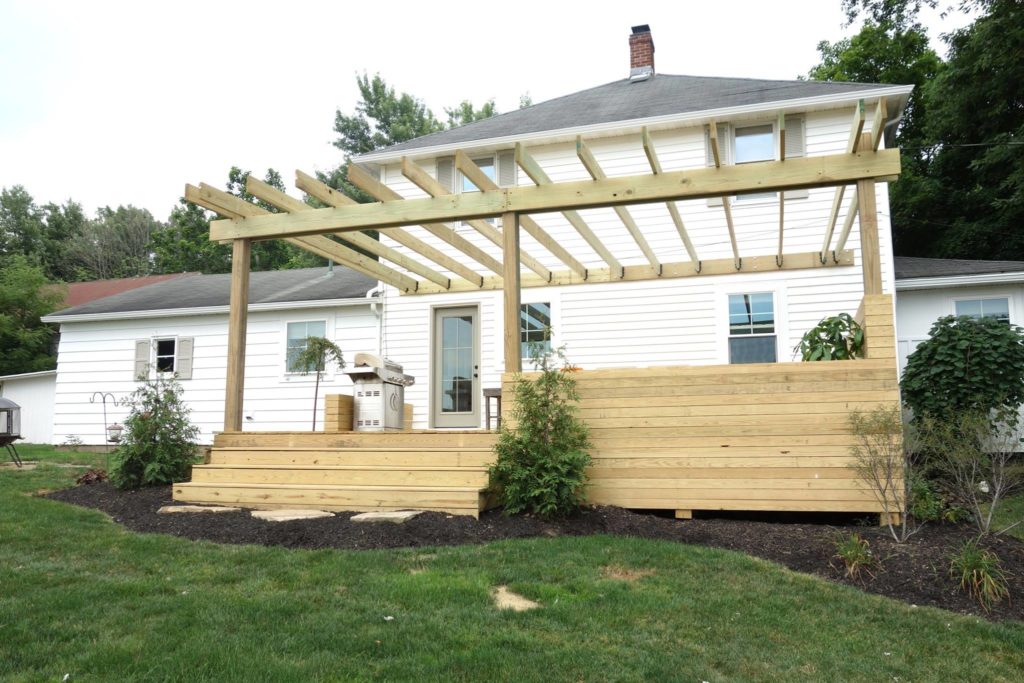
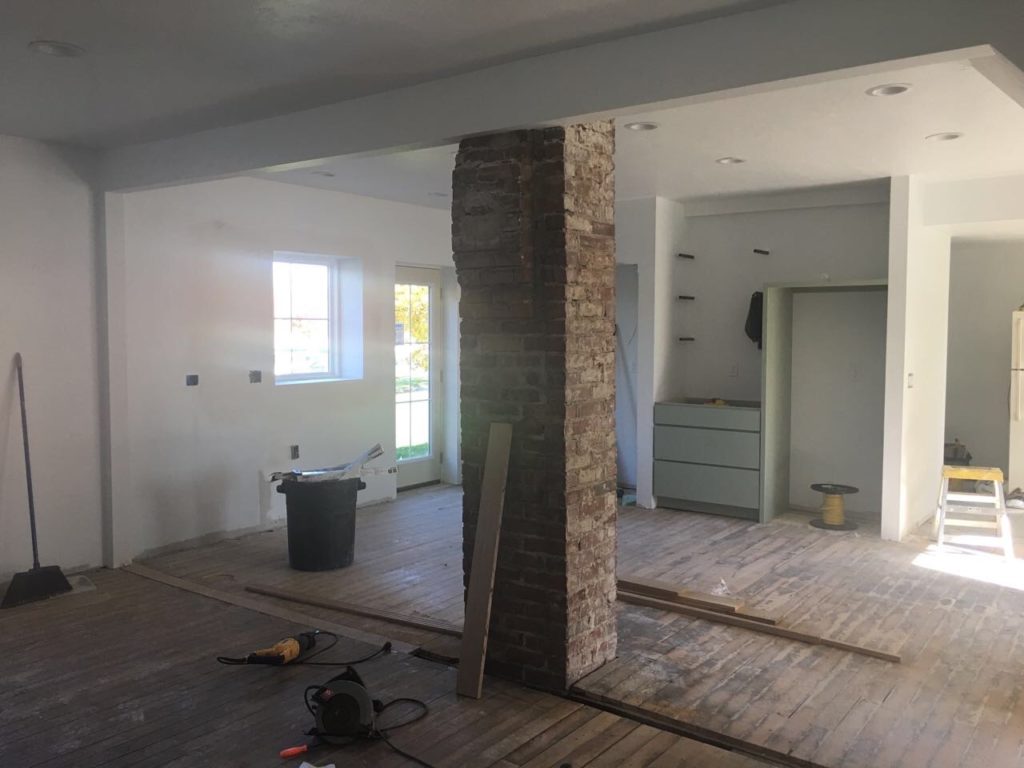
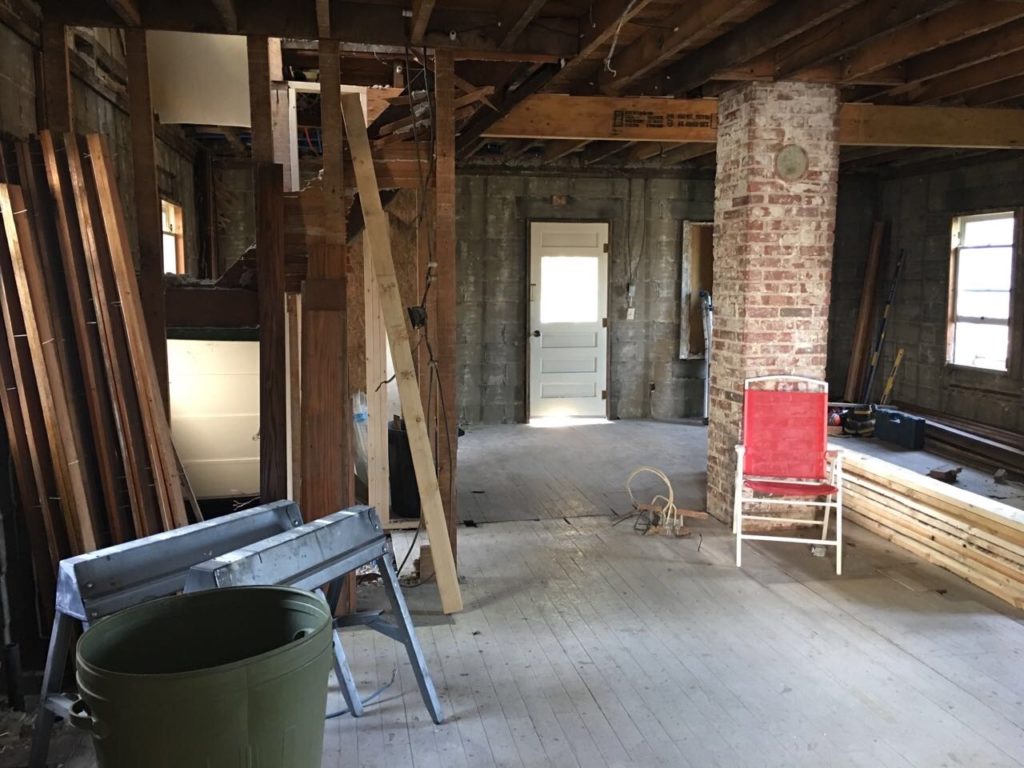
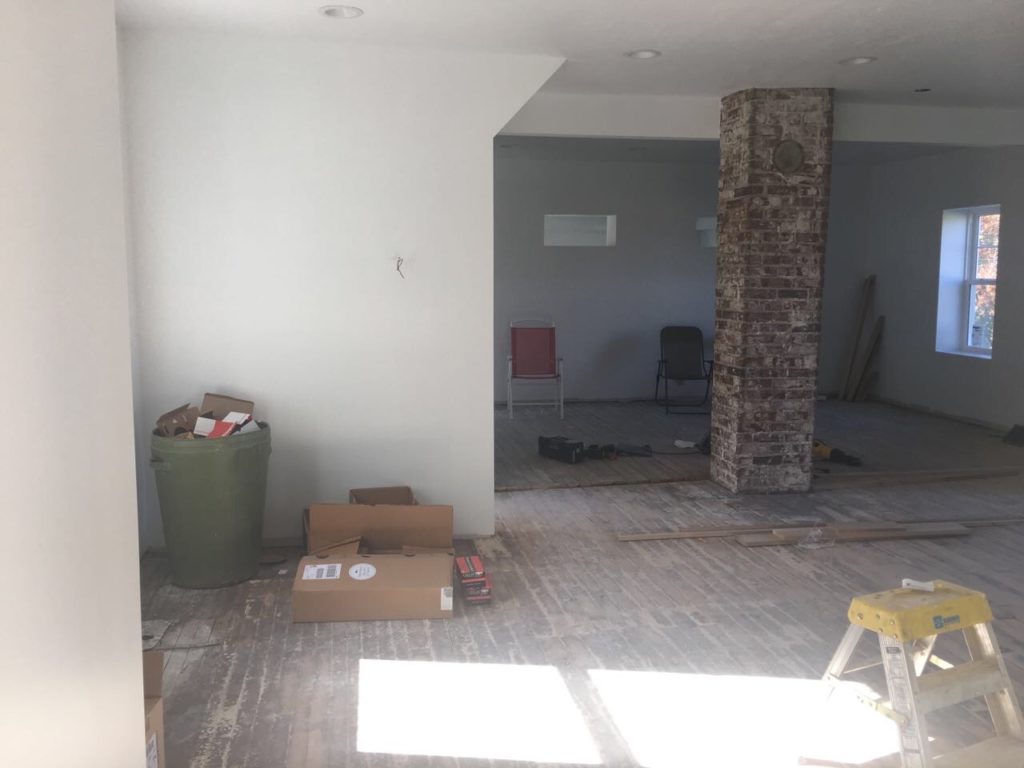
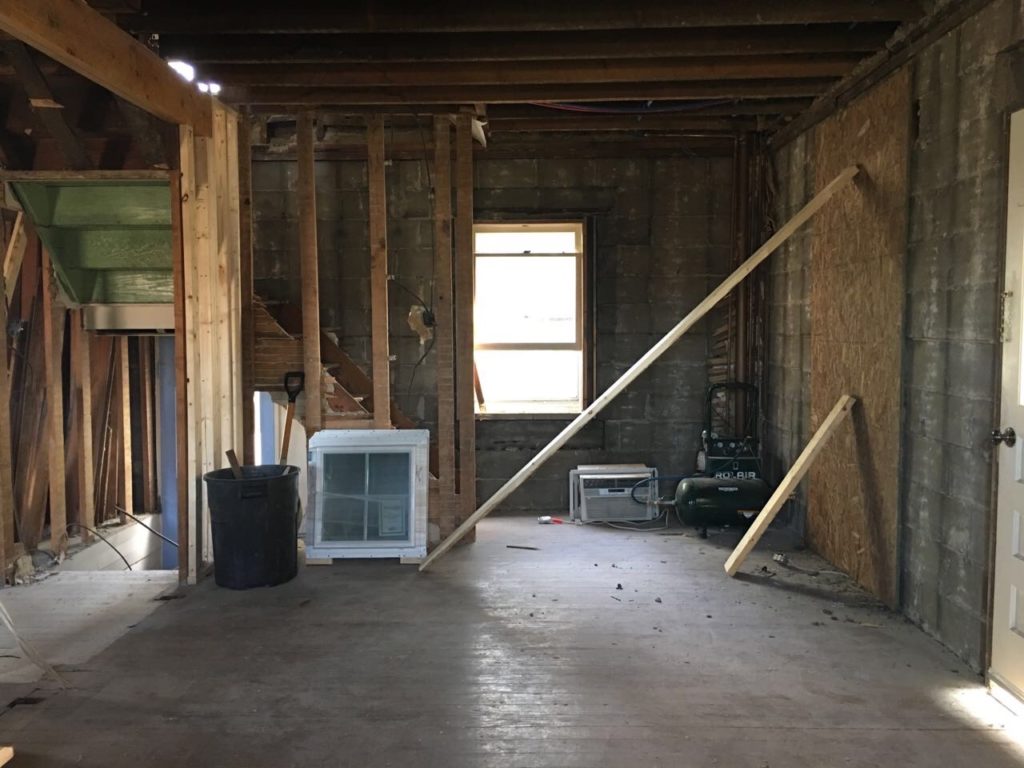
Now we had our remodel plan and so work began on this 100+ year old home of ours. I should preface by saying that we remodeled the nursery for Annie and completed the bathroom remodel two years before we moved out and finished the rest of the house. It was a process. I don’t want you to think that as designers we just got a vision and had the perfect house in an instant. It definitely does NOT work that way! We were the clients here, but also handled a lot of the work ourselves and ALSO had clients of our own to serve. It was a busy time in our lives, but we think it turned out pretty nice. I’ll break down a little bit of what we did in each room and then enjoy the before and afters of our previous personal home.

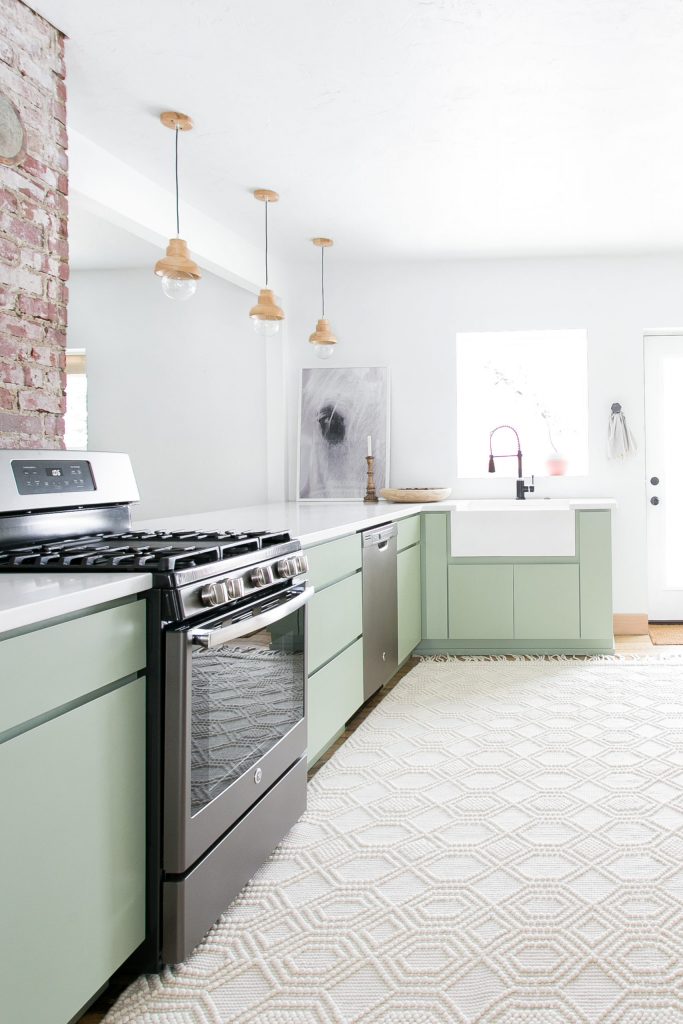
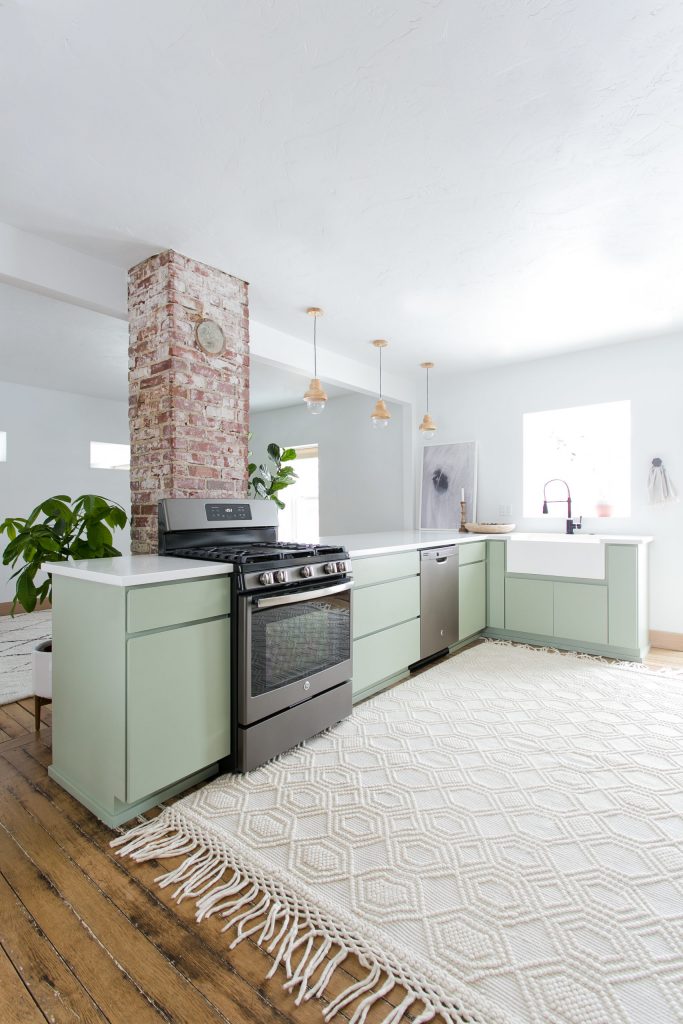
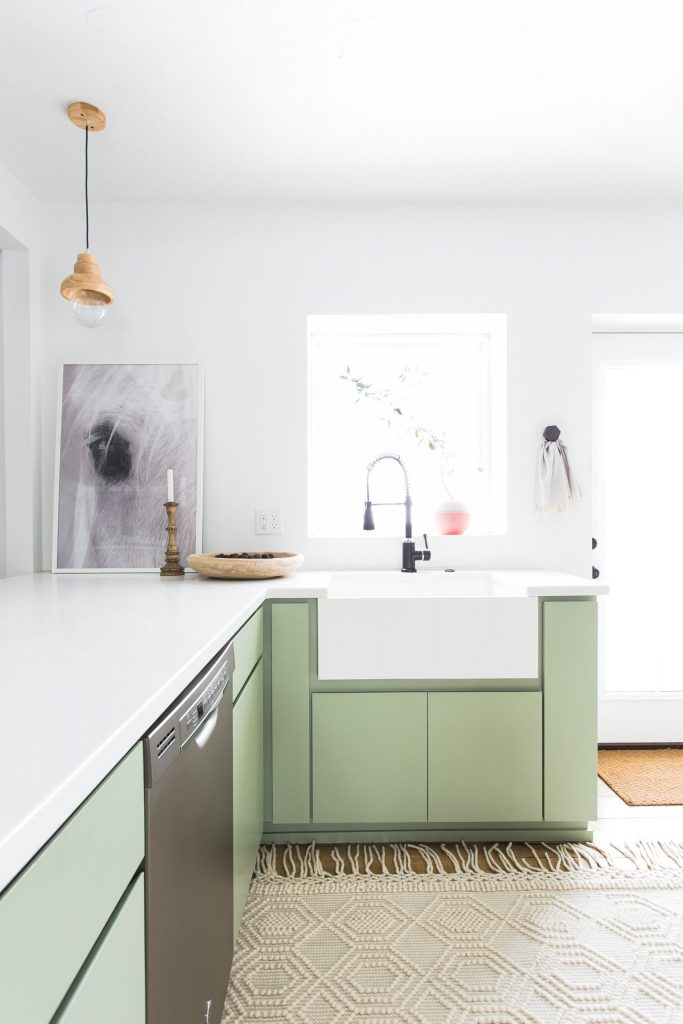
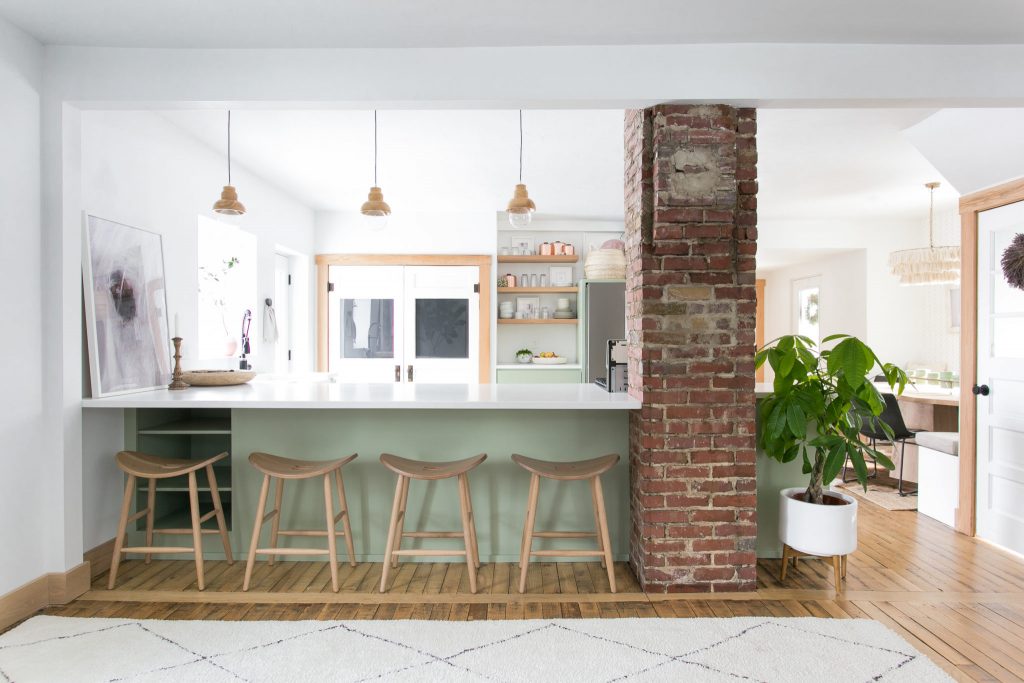
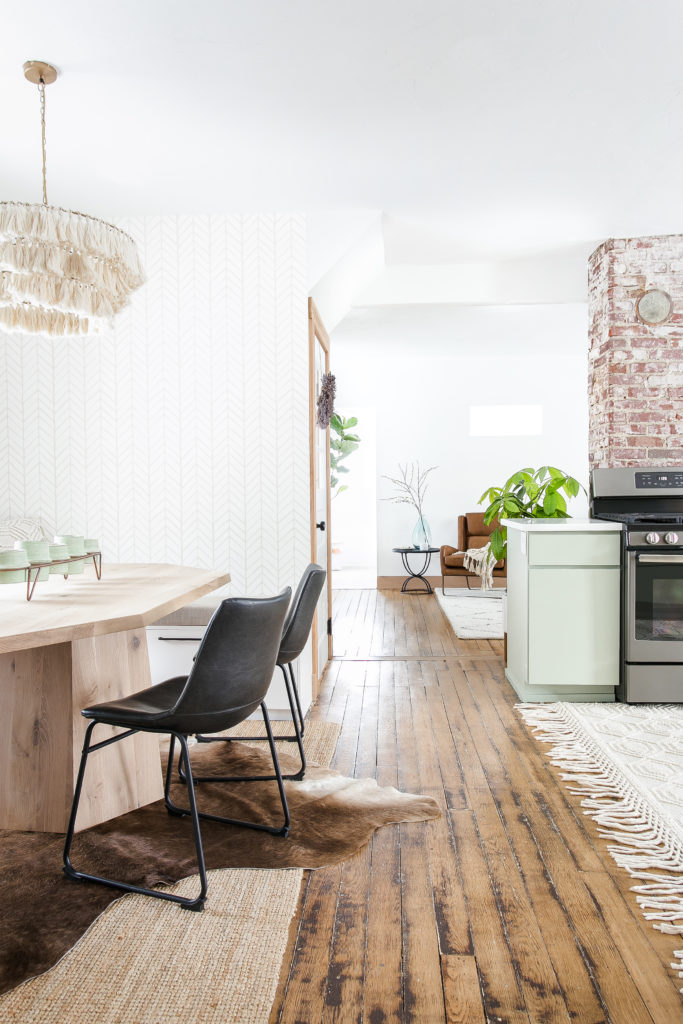
At the time of the main living area renovation we had a two year old and a newborn (!), so I was trying to make life as simple as possible in here. The full overlay flat front cabinets made wiping down little fingerprints and other messes so quick and easy. I also went with a large apron front sink to not only bring in the farmhouse vibe, but also for washing up my babies! This is something I did in our current home as well. It’s just too precious.
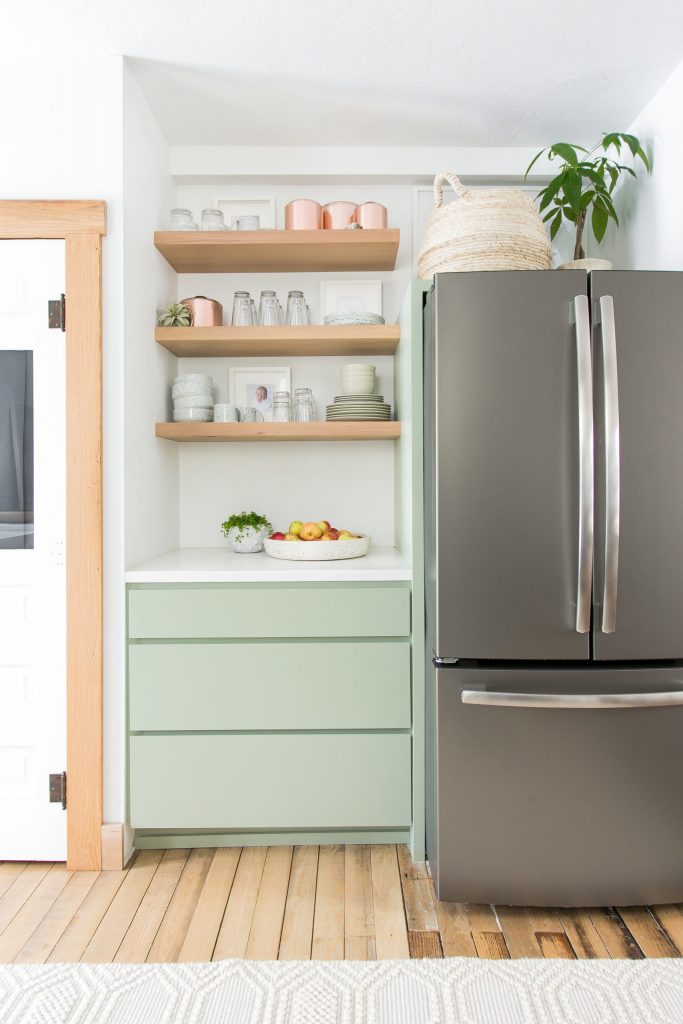
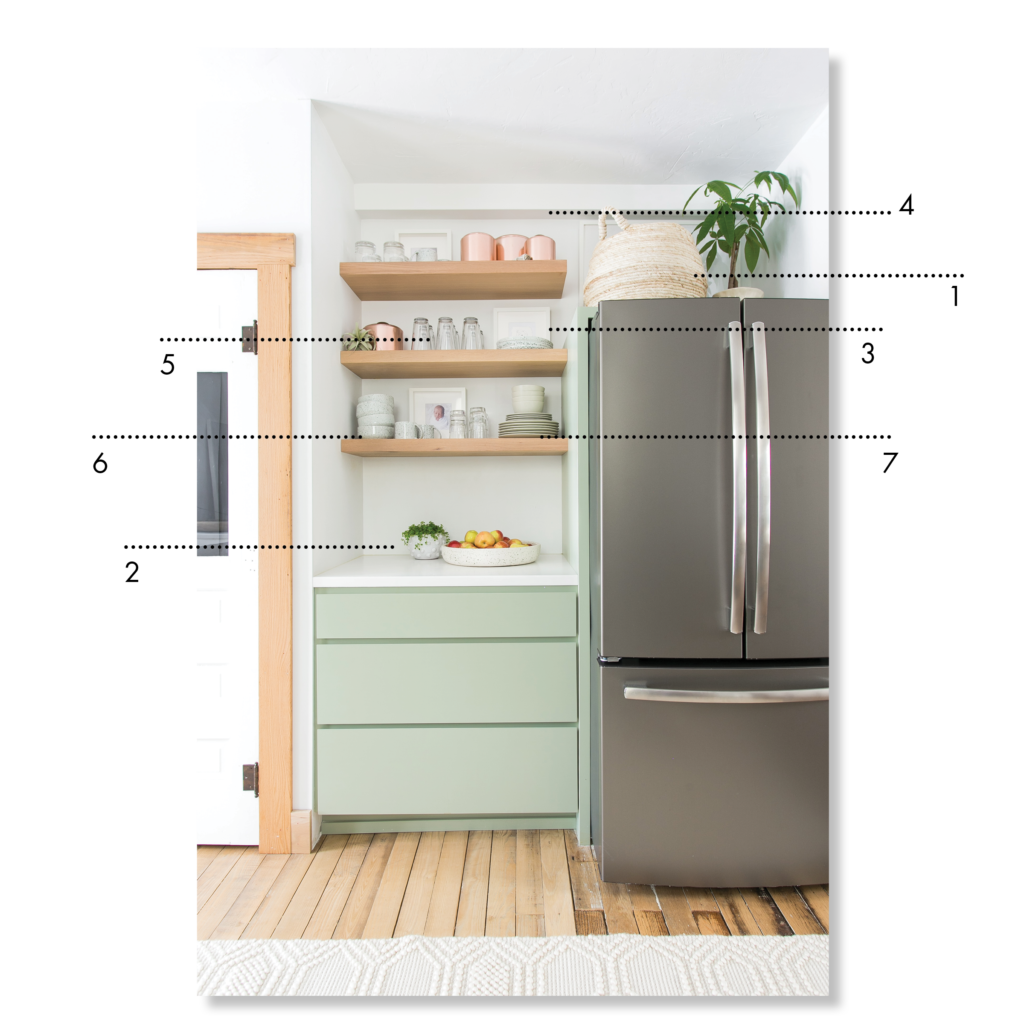
For our easy cleaning cabinetry, I went with a sage green, which is such a fresh and appealing color. I knew that I wanted a pop of color in here, but I didn’t want to go with something too bold to scare away potential buyers in the future. This refreshing green naturally paired well with the tone of the wood floor (which are original and re-finished) and is a great color to use in a kitchen. With the sage cabinets, I wanted to use a white counter. We chose white Corian solid surface as it is a nice upgrade from Formica, but does not cost as much as a natural quartz or stone. It falls somewhere in the middle. The white color also does not show scratches, which is a plus for a family.
The last part of the kitchen remodel was the pantry. We had a countertop installed inside the pantry to house the toaster and other appliances that I don’t prefer to see on the kitchen counter space. Another neat design element was that we used the house’s original front doors as the pantry doors. It felt good to pay homage to the original home.


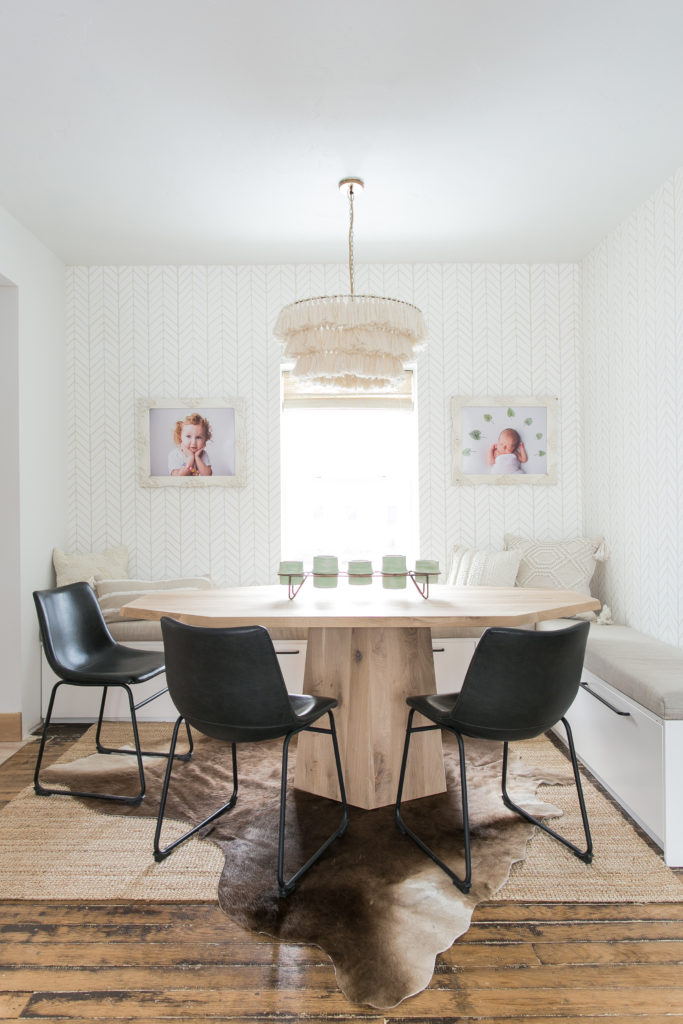
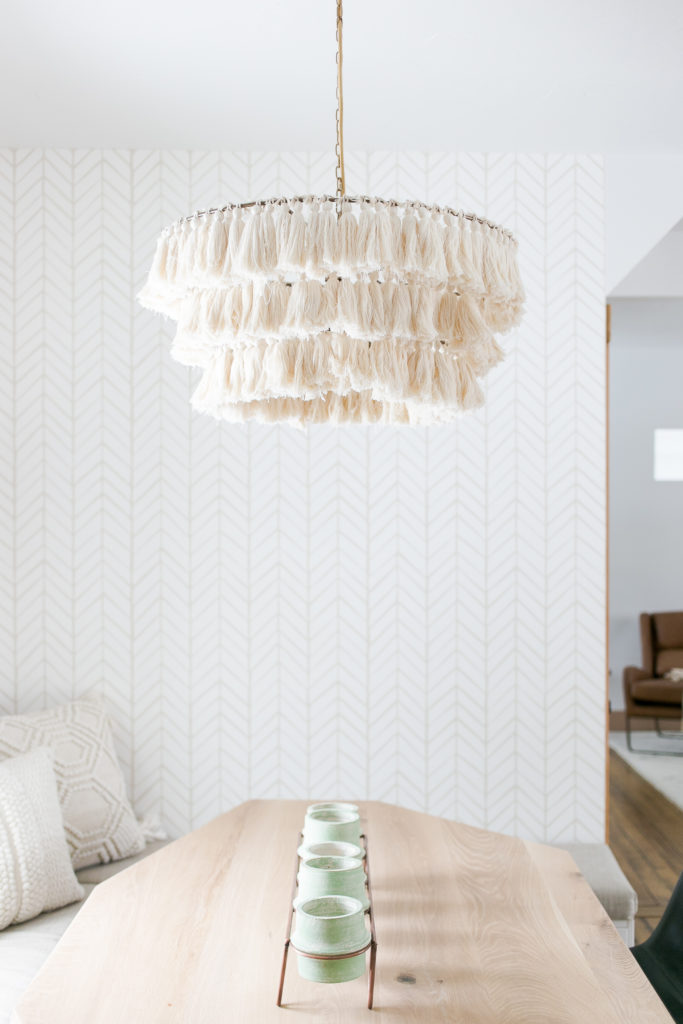
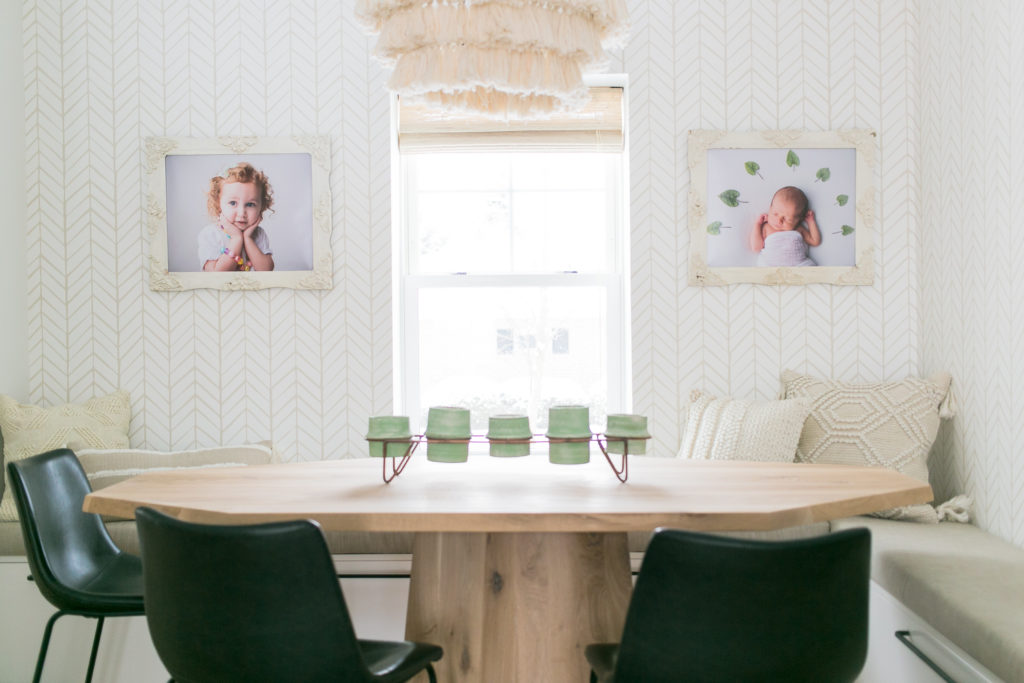
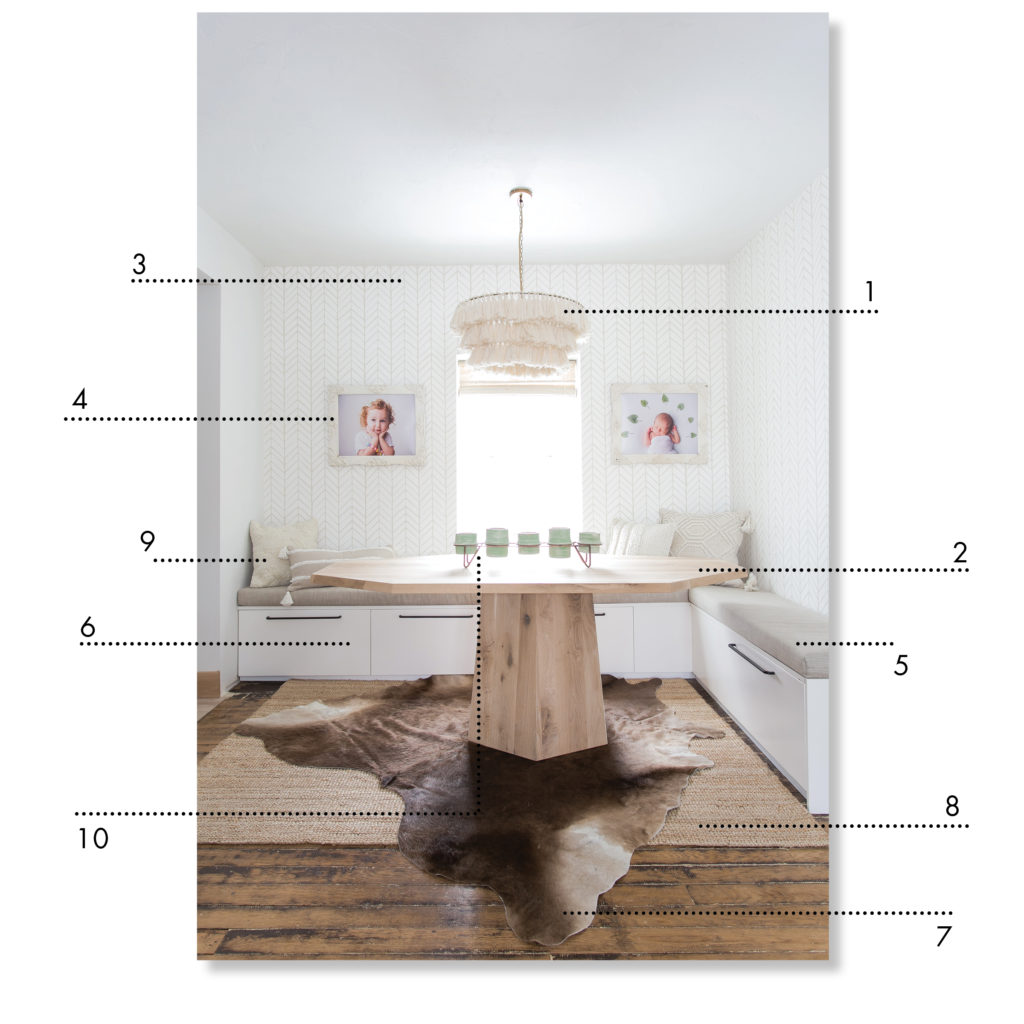
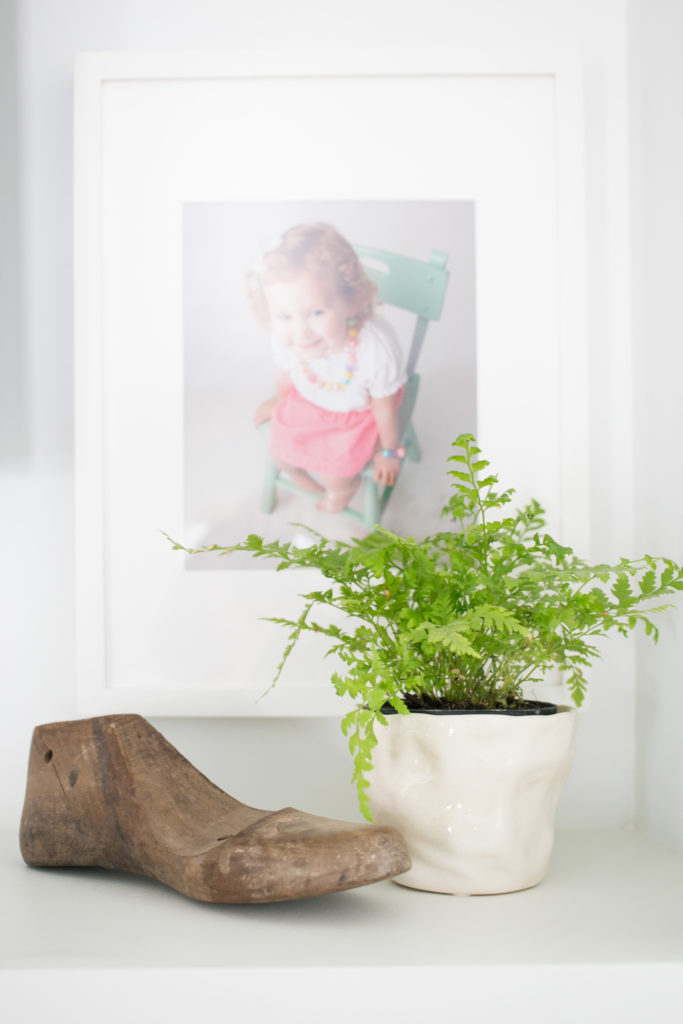
As I mentioned before, there was not really room for a dining room table. I think there is a picture of what we did before the remodel at the end of this post, which worked, but was not ideal. Since we were working with a small space, we used a booth seating idea to maximize the space that we had. This allowed us to fit a fairly decent sized dining table and gave us extra storage. Win win! I custom designed the table to include a pedestal base and an organically shaped top. This pedestal style works best in booth style dining areas because it allows foot room for everyone. Lastly in here, I went with a monochromatic color scheme to keep the design peaceful, but also to set it apart without it being too dominating. I used cream and white wallpaper and cream linen upholstery on the bench as well as the tassel chandelier and the soft white picture frames (which were my grandmother’s) to pull the space together.


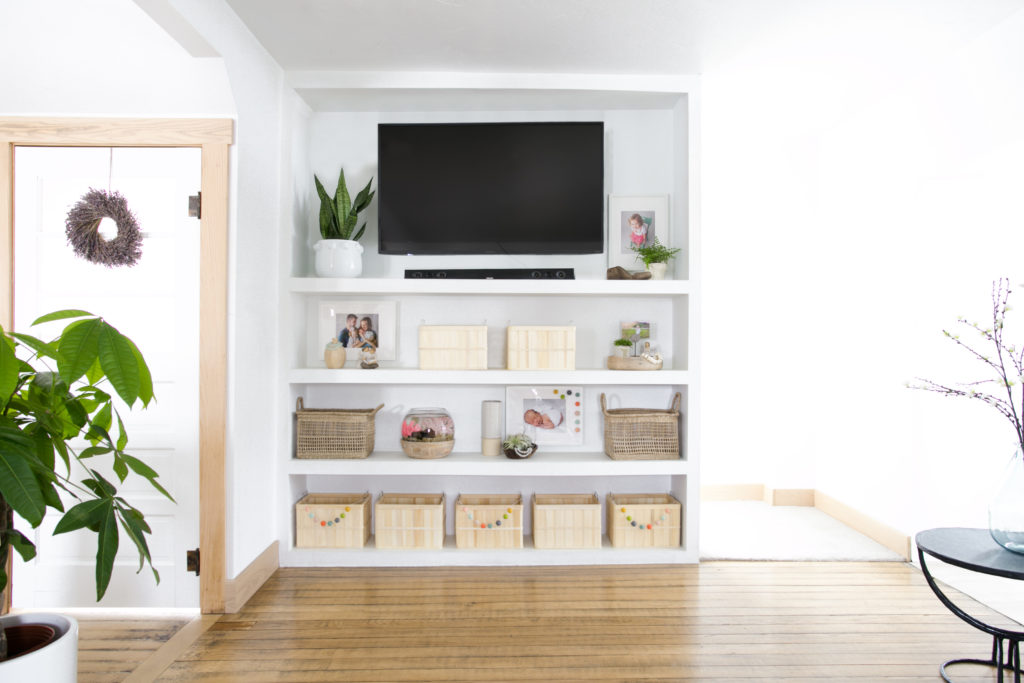
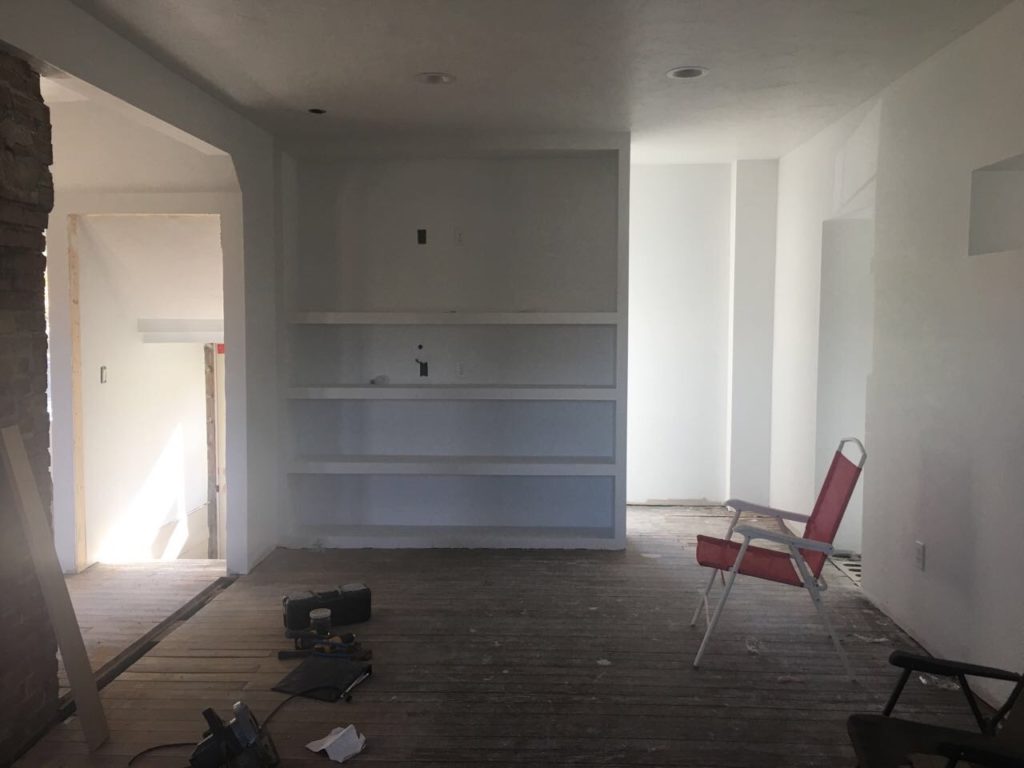
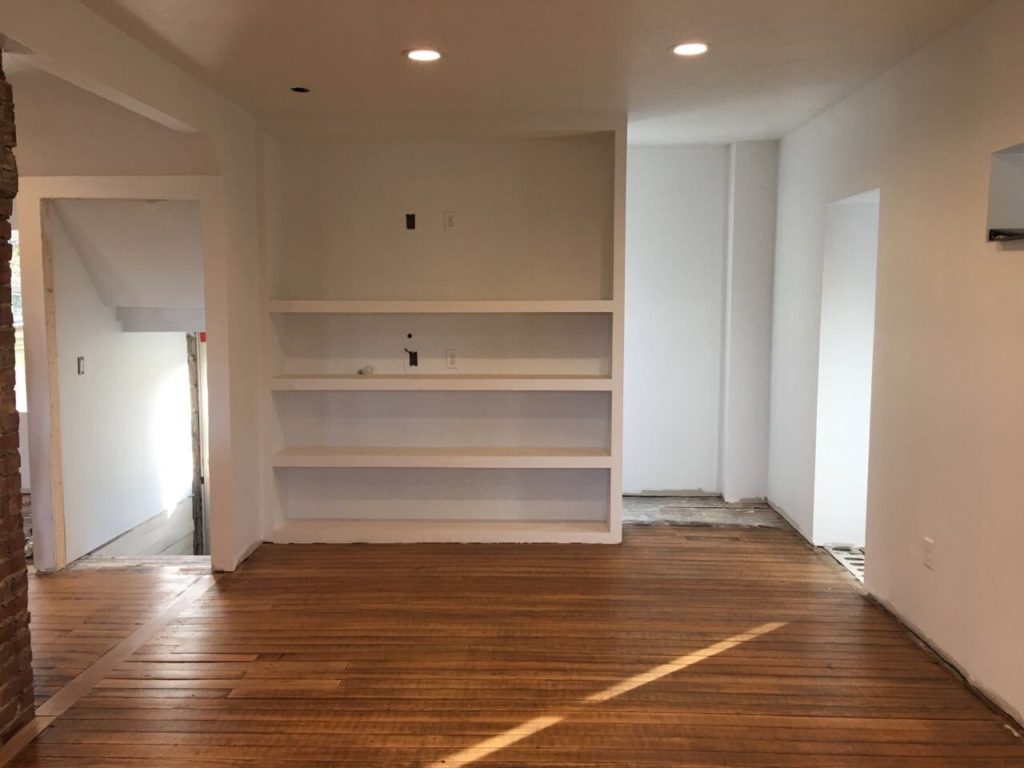
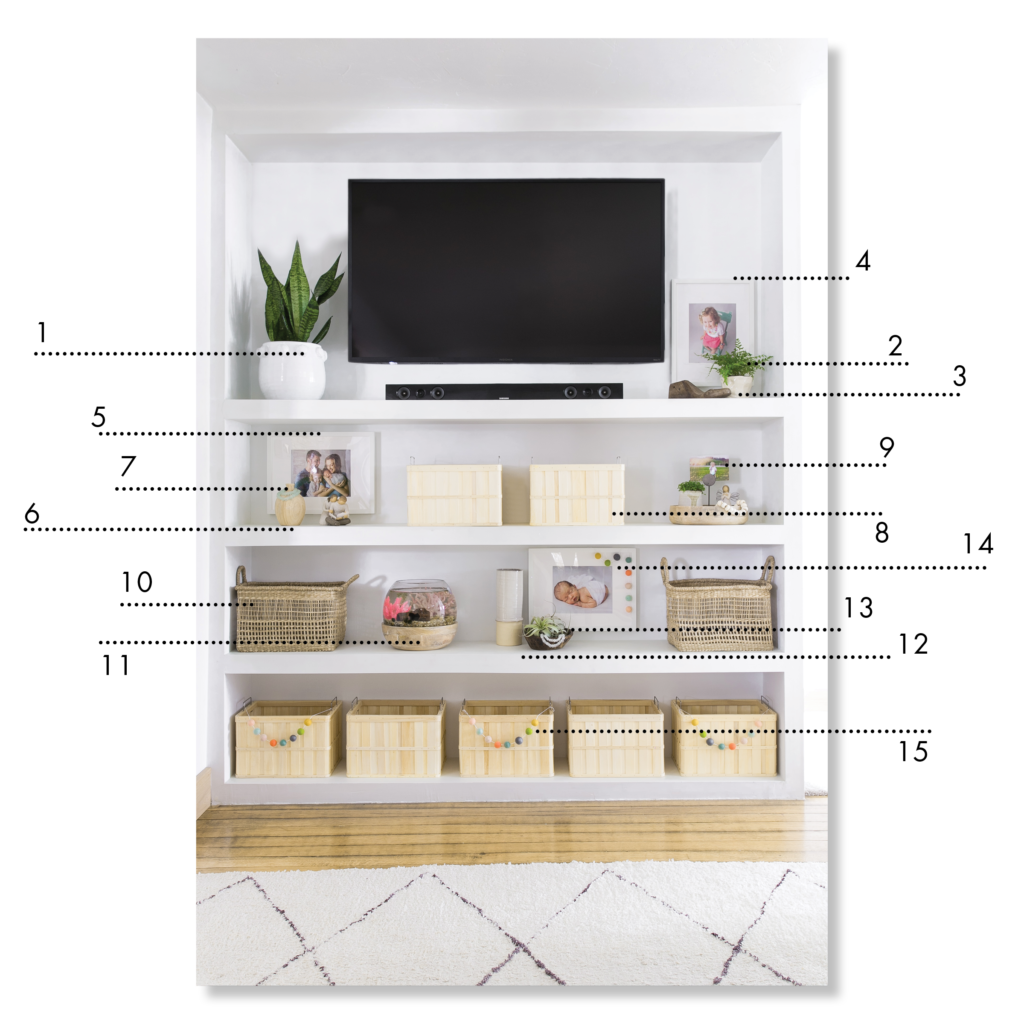
I was probably a little too excited about creating a space for the TV and open shelves for styling and storage in the living room. It wasn’t in the budget to go for full on built-ins and the space felt too small for a large piece of furniture, so I designed this drywall unit to look like a stand alone piece. I had the rough framers frame in the edges and shelves then the drywall crew drywalled the whole thing (I was not their favorite person at the time). I love how it turned out. It was fun to style pretty, but also really easy to use baskets to hide kid toys and TV necessities.

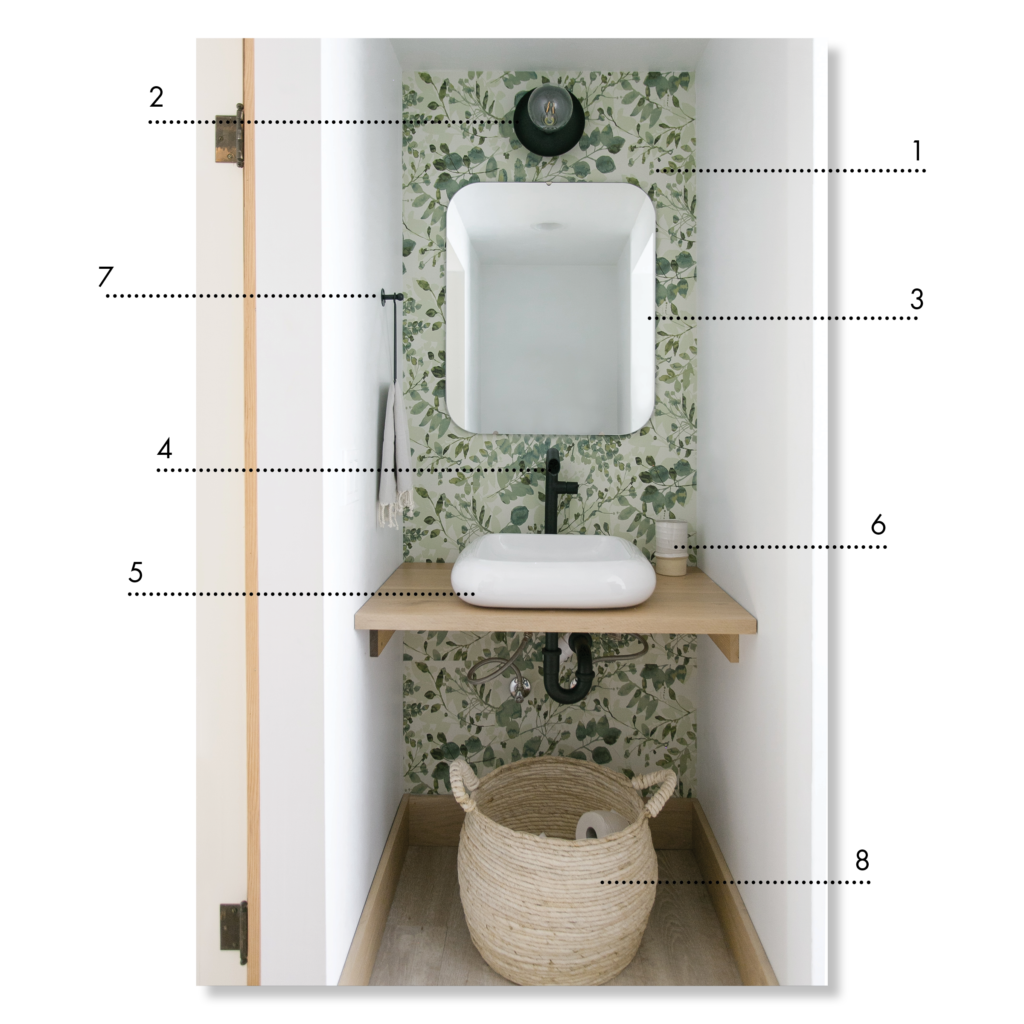
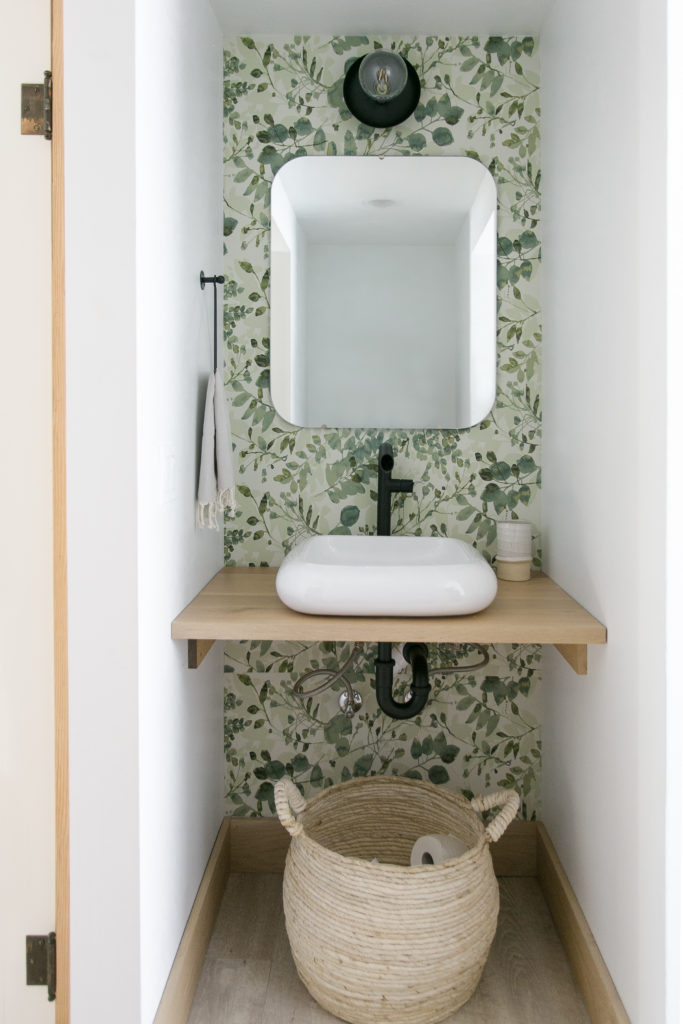
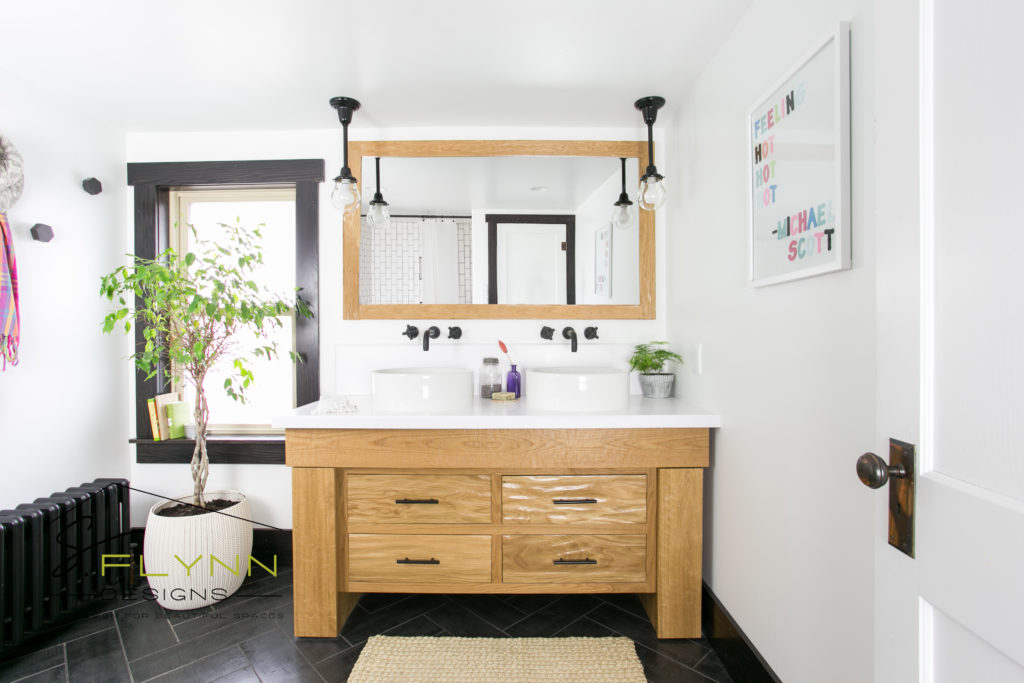
A small bathroom is a great place to add a little pop of visual interest. A frugal way to do this is to use a floating vanity with a vessel sink. I love that the design is eye catching, but also simplistic. I used a green wallpaper to tie into our green cabinetry, which helped to unify the home. Another thing we did in here was to flip the toilet 90 degrees. Since the bathroom was part of the laundry room, I wanted the sink and toilet area to be able to be closed off if needed. I didn’t want guests to have to be staring at our dirty laundry when they came over on the off chance that the laundry room wasn’t in photo shoot ready condition. Ha.
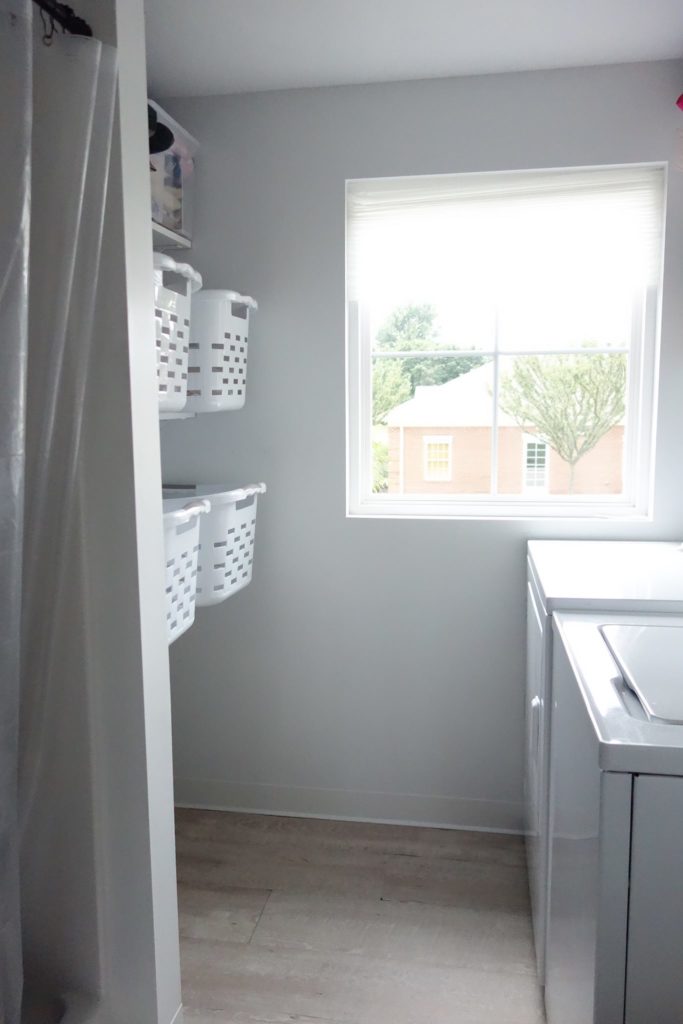
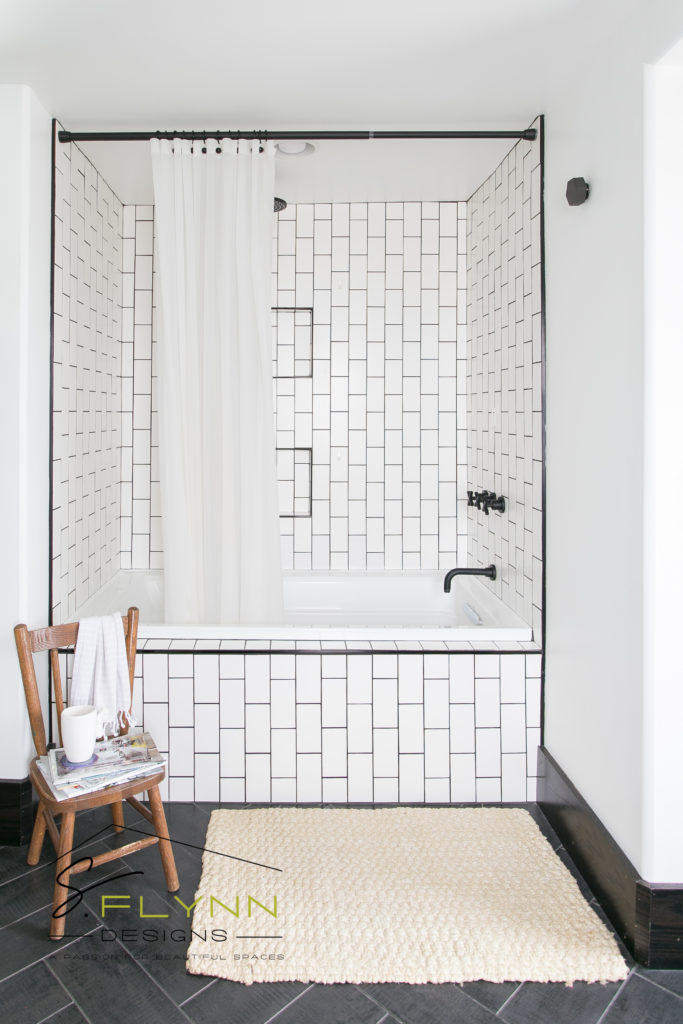
As I said before, there was no shower in the house. We were able to create space in here for one (in addition to the shower we added upstairs) . We also flipped the washer and dryer, so that they now lived on the longer wall in the room. This allowed for a soaking sink and a full wall of shelving above the washer and dryer, which was not possible before because of a crank out window above them. Lastly, we added dirty laundry storage. I love to use shelves for clothes baskets (another thing I used again in our current home) to separate colors and to keep things hidden and tidy.

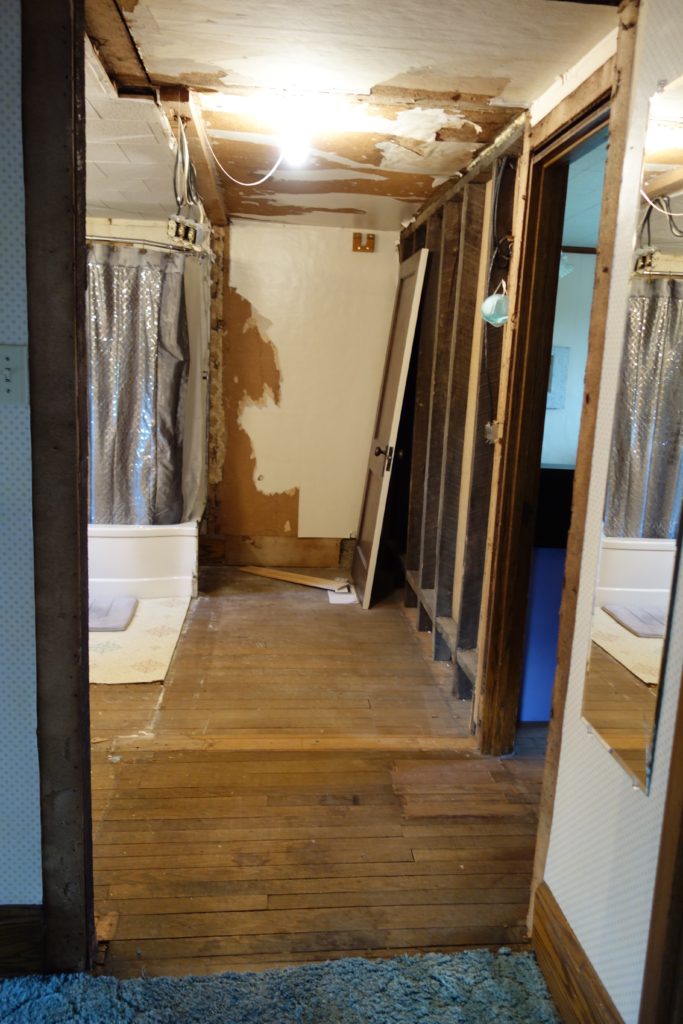
Remember, this was part of our initial renovation before we moved out and did the main floor overhaul. Also, please remember that there was carpet in here. A moment of silence for bathrooms with carpet everywhere … … … okay, good, that’s out of the way. Obviously, we immediately removed said carpet and used a black tile laid in a traditional herringbone pattern with black grout. We did a lot of reconstructive work in here as there was no shower and only one sink. Since this was the main bathroom for the entire house, so we knew we had to make it function for multiple users. I custom designed the rich wood vanity to look like an old farmhouse table, a nod to our old farmhouse itself, and included space for a second sink and extra storage. We reconfigured the bathroom to include the tub/shower space which was tiled in a traditional white subway tile lain vertically. I chose to lay the tile vertically because we have low ceilings and this would draw the eye upward.


And that, my friends, was the Olde Farmhouse Flip. Our blood, sweat, and probably some tears are flowing through that place and though it has now moved on to new owners, it will always hold a special place in our hearts. I hope it inspires you to work with the space you have been given and find storage solutions in new and unique ways.