Project Bunker Hill really hits home for me. Literally, Ha! This is Kyle and my’s personal home. We purchased this house three years ago, so we are behind on the reveal, but better late than never right? This is not our first personal remodel, we have a blog on our previous fixer-upper that you can read here!
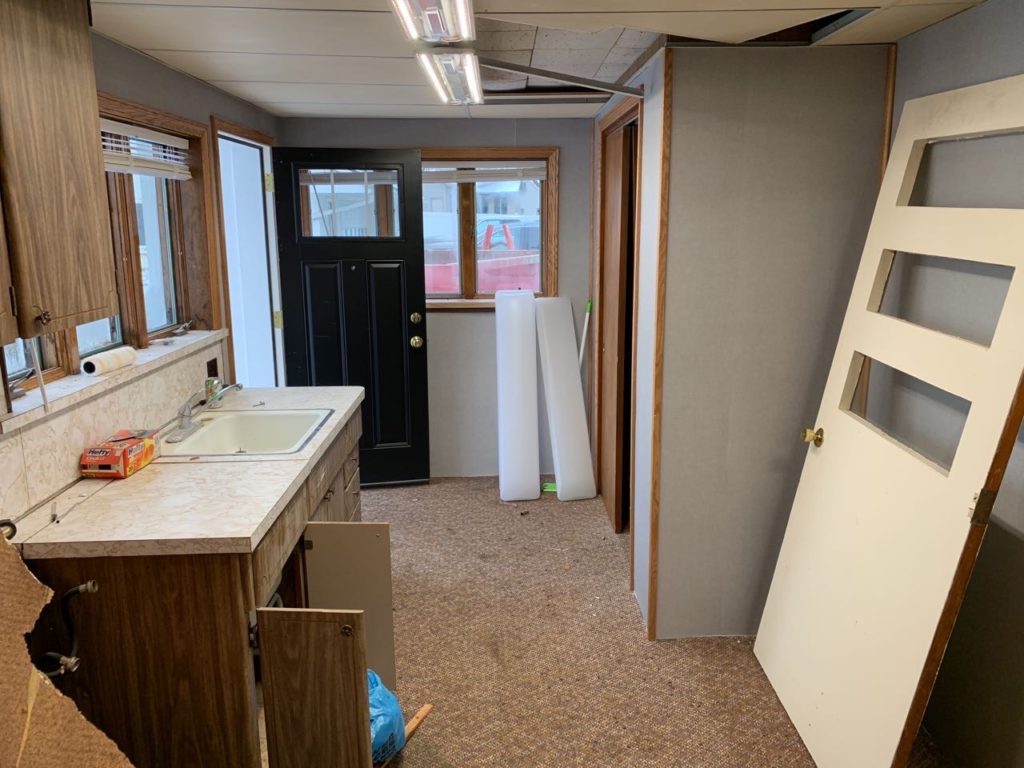
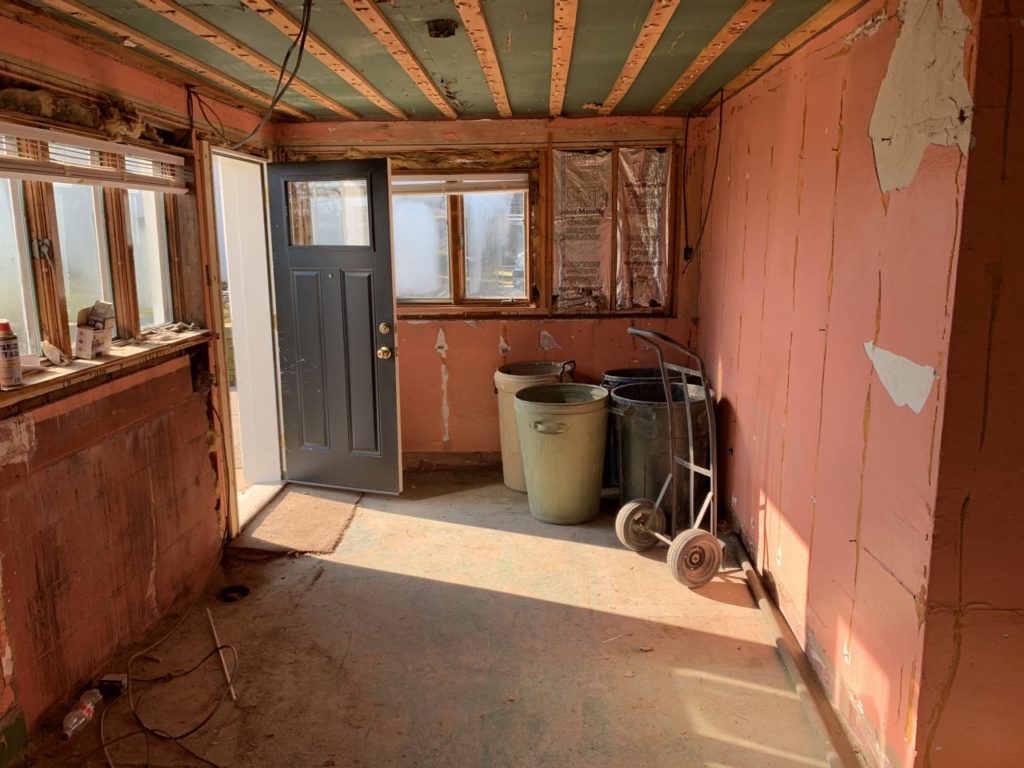
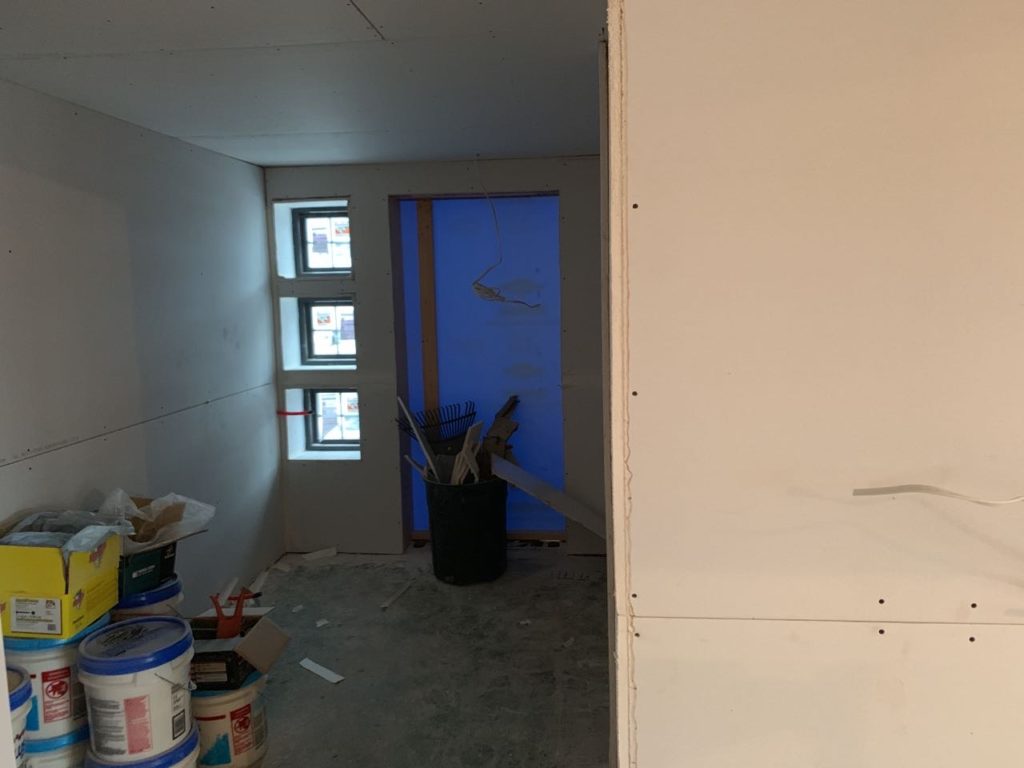
This house was a fixer-upper! When we purchased it we knew it was a risk and that we could potentially run into more problems and issues than we had originally thought. We ended up tearing down and changing so much of this house that our subs asked us why we didn’t just knock it down and start completely new.
We will be revealing our home, room by room in five separate blogs.
Up first is our Entry Way, Mudroom, and Laundry Room. Enjoy!
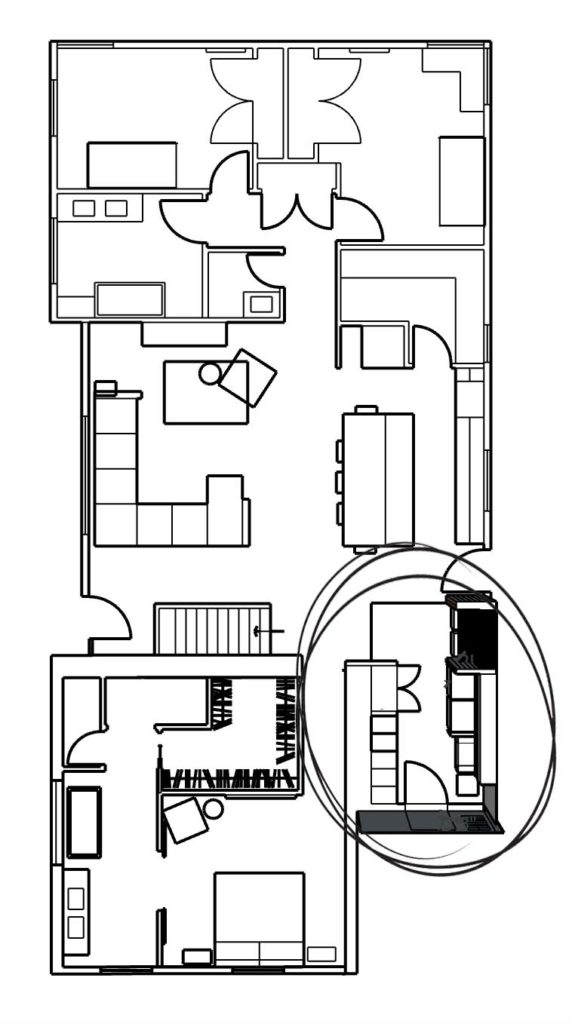
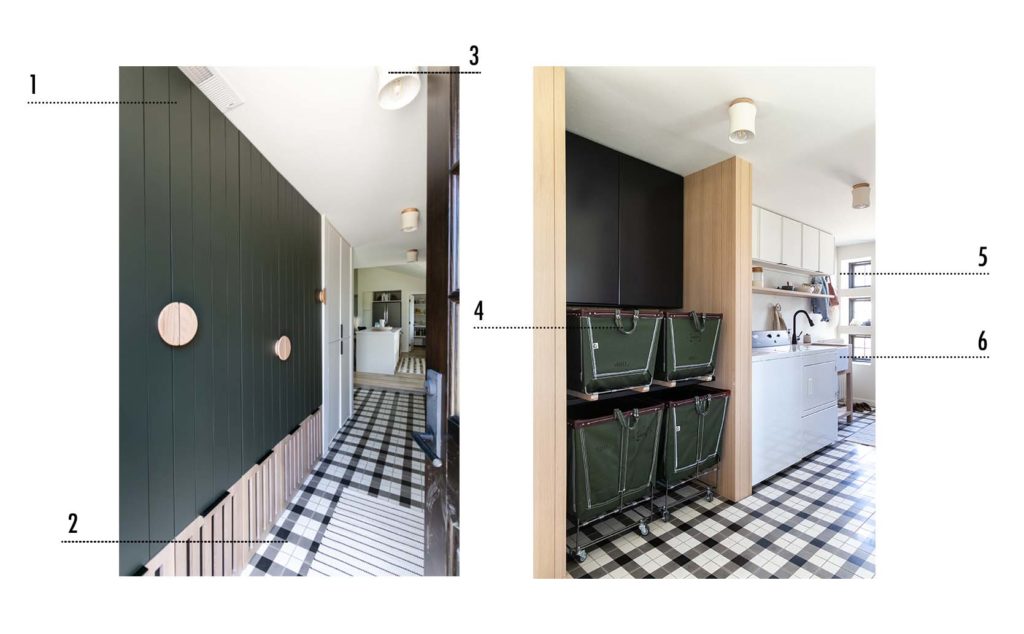
Entry
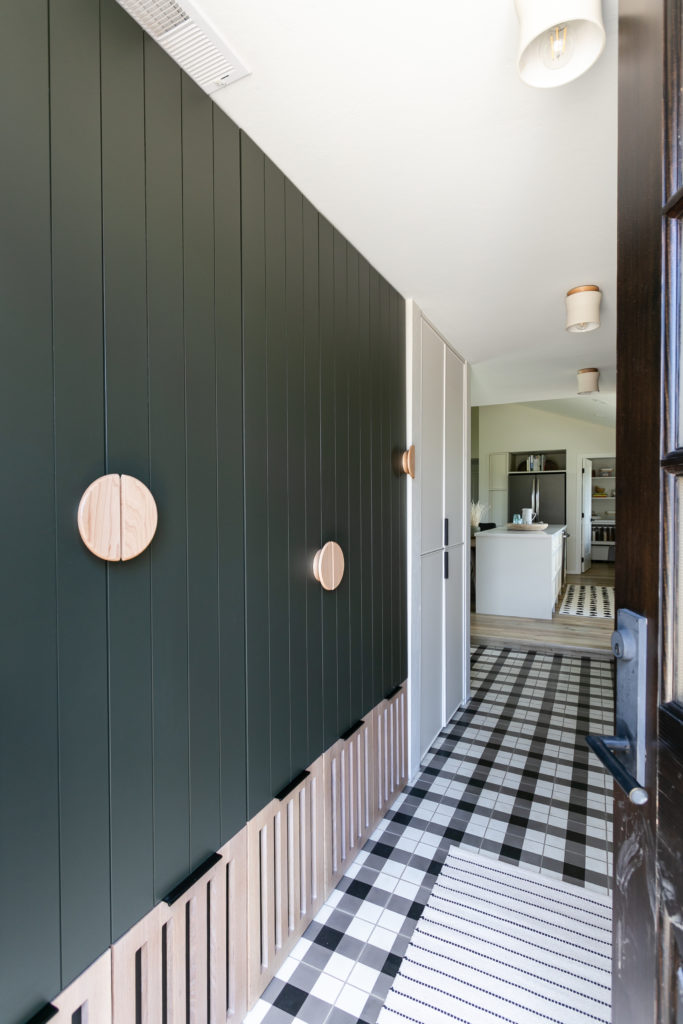
The entry to this house originally was not ideal. You had to walk through two different doors to get into the main area of the home. Everything was super tight and we needed to make it feel more spacious and overall function better. It was originally a laundry room but we needed it to function as a mudroom as well. We know this area would be the main entrance for us every day and for friends/family so we wanted it to set the tone for the rest of the house.
We first started by moving where the door originally was. Instead of entering from the side of the house, we moved it so you could walk right in. By changing the way you enter the house, we were able to gain wall space needed to make the laundry room and mudroom happen. It also added a curb appeal which dressed up the outside. I also added three cute little windows to allow more light to enter the house, since I had eliminated other widows for cabinet storage, and they help create a unique look.
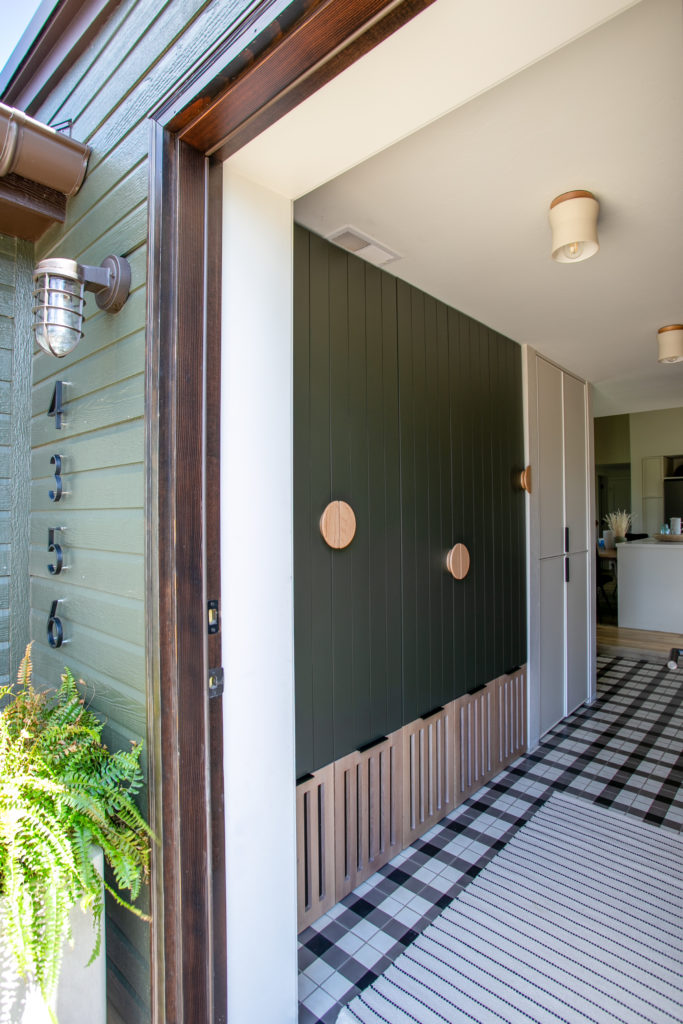
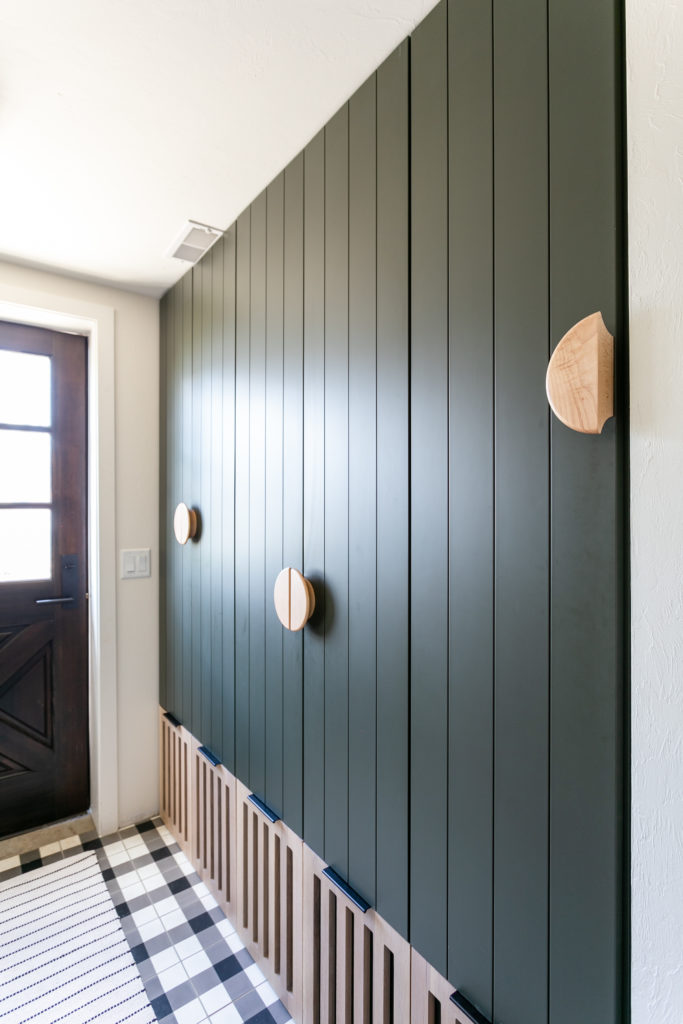
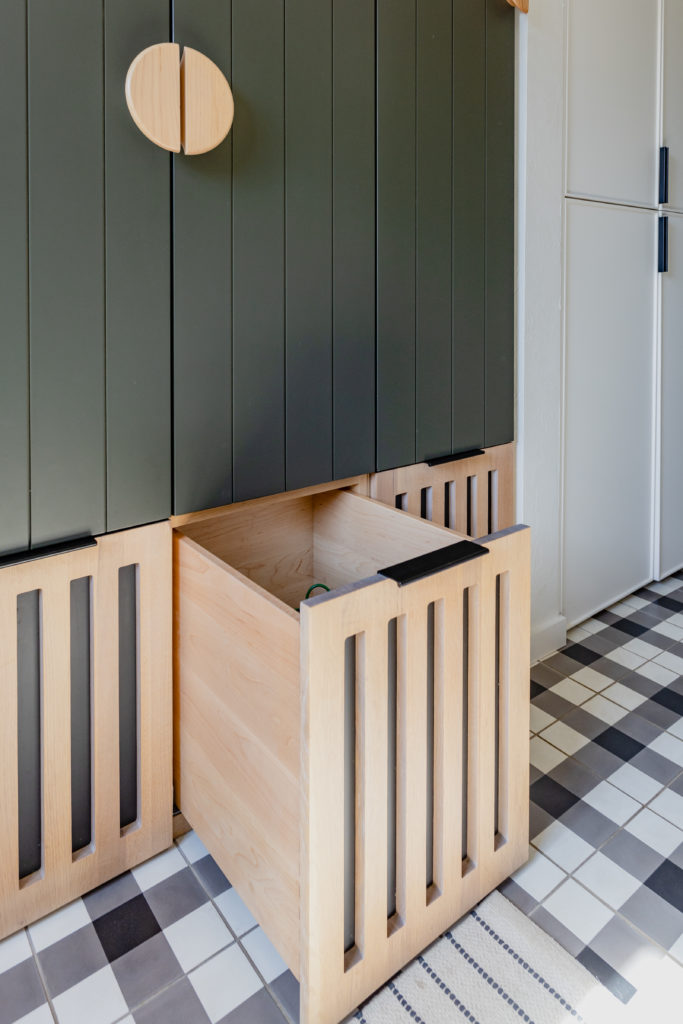
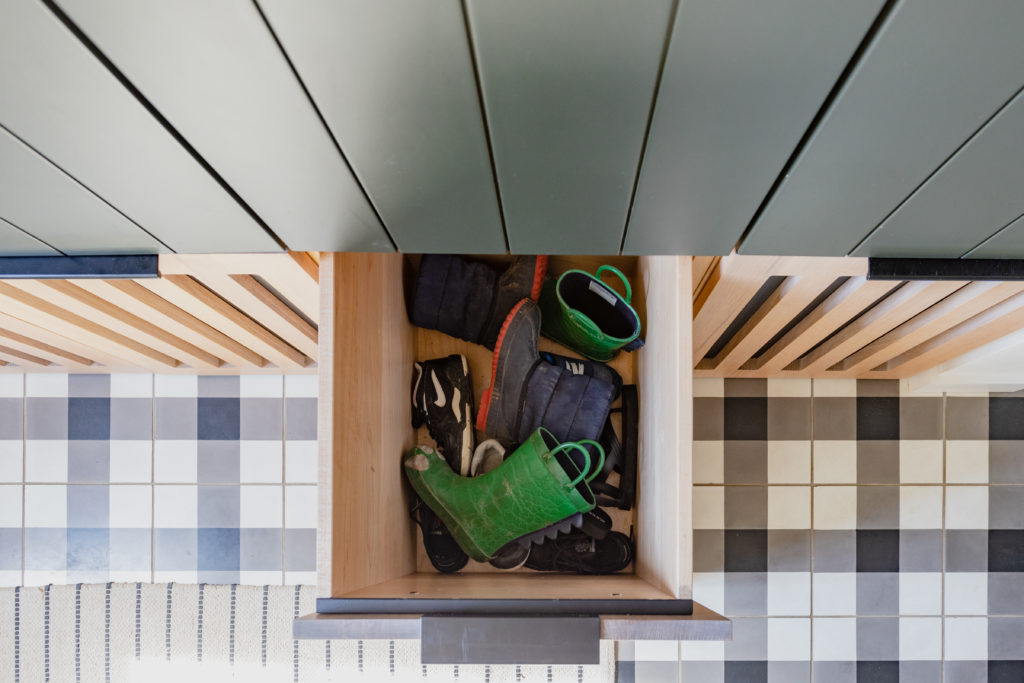
Mudroom Lockers
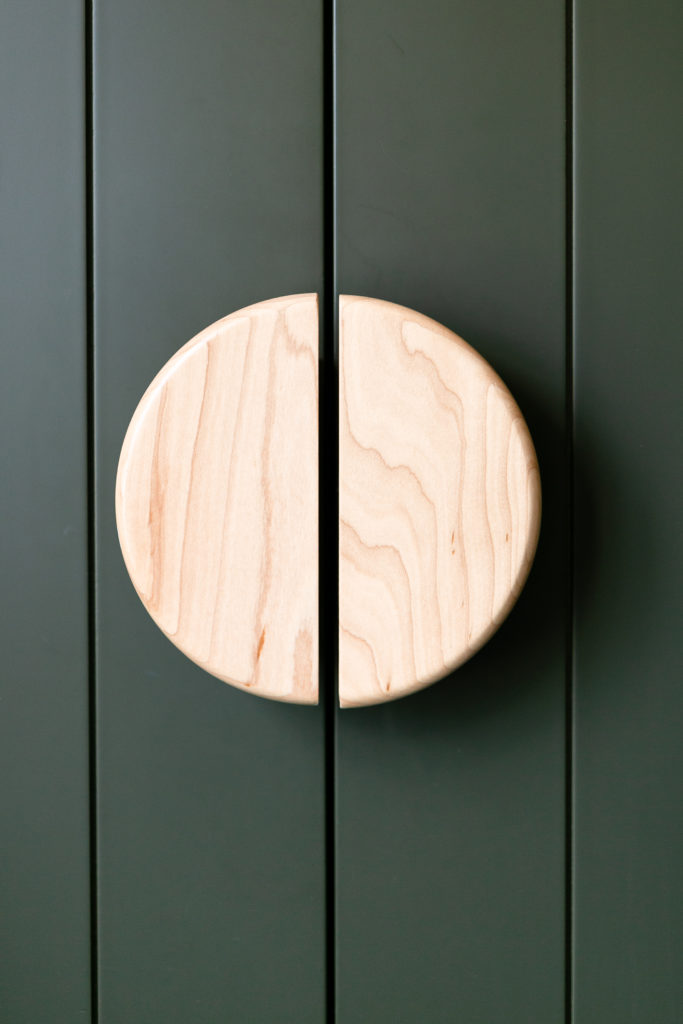
We painted the outside of the house a deep moody green which you will see in a later blog, so to make everything flow, we used the same on the lockers right as you enter the house. To utilize the space, we made the lockers extra deep to fit everything. I wanted to keep it clean, so we added doors to the main part and drawers on the bottom for shoes. Lightened-up the dark moody green color, by using white oak on the shoe drawers and fun round knobs for the doors. This house is small, and I took advantage of a little extra space to the right of the lockers to make a cleaning closet. I love the slim shaker inset cabinet doors that blend in with the wall color.
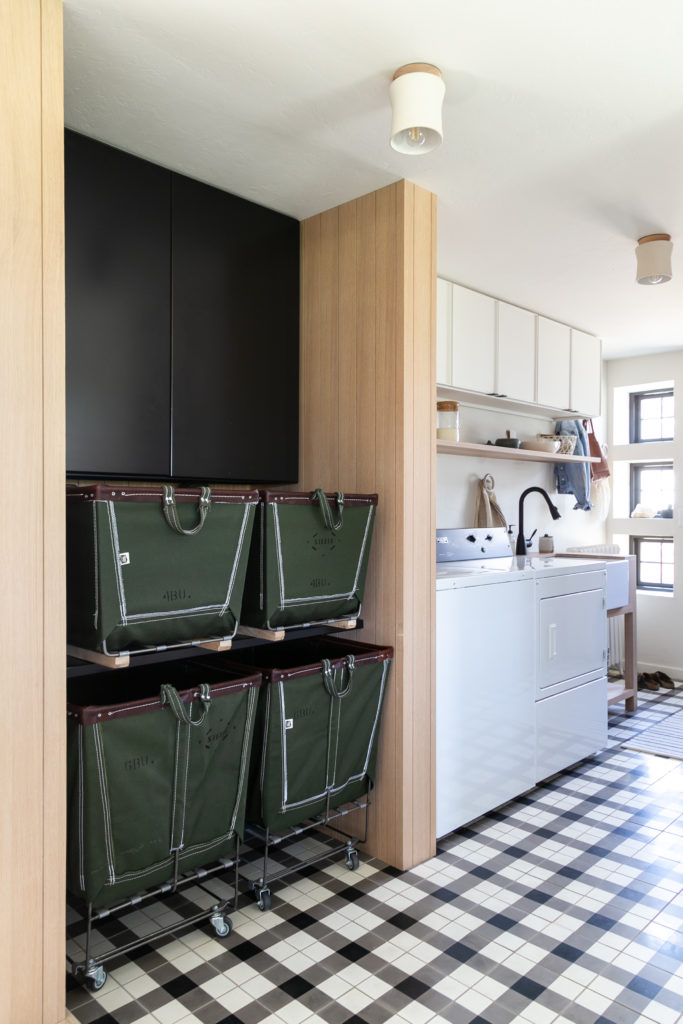
Laundry Room
Where the exterior door originally was we added a sink vanity. I didn’t want anything visually heavy in that area so I went with an open-framed vanity made of white oak. We put a large farmhouse sink in it because we are in the stage of life where we need to soak the kids’ clothes. [I am beginning to see it is not a season in life, it is ongoing] To the left of the vanity is the washer and dryer. As much as I love the look of a front-load, I like the function of a top-load. So I opted for these stripped-down black and white Maytag’s. We added a white oak shelf above to tie with the other white oak accents. I am using this as a place to put my laundry detergent for easy access, so having it displayed on an open shelf does not bother me.
Unfortunately, the ceiling is really low in this area so I was doing everything I could to make the space feel open and larger, but also trying to get as much storage as possible out of it. To do this, I added white slim shaker cabinets that go all the way up to the ceiling and were not visually heavy. This is also why I incorporated the vertical lines on the locker fronts and laundry storage area, that help elongate and draw the eye up. …just like vertical stripes on a shirt.
Laundry Storage
This leads me to the laundry storage area. I like to store the dirty laundry in the laundry room. Because this area is still the main entrance for friends and family, I needed something to keep it looking clean. We created space out of White Oak Slats to store four Steele Canvas carts to hide the laundry. I went with the same color as the lockers for the carts to keep everything flowing and to help pull it all together. Because we could use all the storage we can get and wanted to utilize all the space we had, I added matte black storage cabinets above this area.